Difference between revisions of "Vault of Glass (Age of Triumph)"
(→Weapons) |
|||
| (39 intermediate revisions by the same user not shown) | |||
| Line 12: | Line 12: | ||
|Description= | |Description= | ||
}} | }} | ||
| − | {{ | + | {{TOCRIGHT}} |
| − | + | ||
| − | + | ||
| − | + | ||
==Introduction== | ==Introduction== | ||
| − | + | [[Vault of Glass (Age of Triumph)]] is the [[Light]] [[Level]] 390 version of [[Vault of Glass]] released in [[Age of Triumph]]. | |
==Challenge Modes== | ==Challenge Modes== | ||
| + | ===[[Templar Challenge]]=== | ||
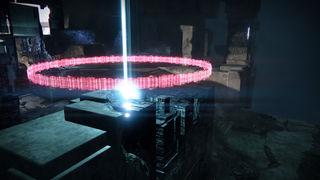
| + | Block each teleport phase. Relic was only held by 1 Guardian throughout this phase. Teleport can be blocked by Guardians, not just the Relic holder by standing in his teleport 'circle' which appears before he goes. | ||
| − | == | + | ===[[Atheon Challenge]]=== |
| + | When teleported, each Guardian can only kill 1 Oracle. There are 6 Oracles total on Mars / Venus. This means, the Guardians who '''DO NOT''' get teleported initially must go '''INSIDE''' the portal (Leaving someone outside to keep it open) to kill an Oracle each to complete the Challenge - In addition to this, if a Guardian dies without killing an Oracle first and you DO NOT kill Atheon, Challenge Failed as that would mean there isn't a 6th for an Oracle. | ||
| + | *Aegis blast can kill an Oralce (Relic Holder SGA) | ||
| + | |||
| + | ==Loot Table== | ||
| + | {{see also|#Loot}} | ||
| + | ===Trials of Kabr=== | ||
| + | '''Chest''' | ||
| + | *[[Class Item]] | ||
| + | *Guaranteed [[Legendary Engram]] | ||
| + | *[[Knuckles of Eao]] | ||
| + | *Chance for [[Exotic]] | ||
| + | *Chance for [[Artifact]] | ||
| + | |||
| + | ===Templar's Well=== | ||
| + | '''Chest''' | ||
| + | *[[Class Item]] | ||
| + | *Chance for [[Exotic]] | ||
| + | *Chance for [[Artifact]] | ||
| + | |||
| + | ===Confluxes=== | ||
| + | *[[Class Item]] | ||
| + | *[[Legendary Engram]] | ||
| + | *Chance for [[Exotic]] | ||
| + | *[[Weapon Parts]] | ||
| + | |||
| + | ===Oracles=== | ||
| + | *[[Class Item]] | ||
| + | *Guaranteed [[Legendary Engram]] | ||
| + | *Chance for [[Exotic]] | ||
| + | *[[Weapon Parts]] | ||
| + | |||
| + | ===Templar=== | ||
| + | '''Weapons''' | ||
| + | *[[Found Verdict]] | ||
| + | *[[Hezen Vengeance]] | ||
| + | *[[Praedyth's Revenge]] | ||
| + | *[[Praetorian Foil]] | ||
| + | *[[Atheon's Epilogue]] / [[Atheon's Epilogue (Adept)]] from [[Challenge Mode]] | ||
| + | *[[Fatebringer]] / [[Fatebringer (Adept)]] from Challenge Mode | ||
| + | *[[Praedyth's Timepiece]] / [[Praedyth's Timepiece (Adept)]] from Challenge Mode | ||
| + | *[[Vision of Confluence]] / [[Vision of Confluence (Adept)]] from Challenge Mode | ||
| + | When completing Challenge Mode, you are guaranteed one of the above Primary Adept Weapons. | ||
| + | |||
| + | '''Armor''' | ||
| + | *[[Gauntlets]] | ||
| + | *[[Leg Armor]] | ||
| + | |||
| + | '''Inventory''' | ||
| + | *Guaranteed 1 [[Age of Triumph Ornament]] and [[Collapse of Space]] ([[Emblem]]) for Challenge Mode Completion | ||
| + | |||
| + | ===Gorgon's Maze=== | ||
| + | '''Chest 1''' | ||
| + | *Guaranteed [[Legendary Engram]] | ||
| + | *Chance for [[Exotic]] | ||
| + | |||
| + | '''Chest 2''' | ||
| + | *Chance for [[Exotic]] | ||
| + | *Chance for [[Artifact]] | ||
| + | *[[Weapon Parts]] | ||
| + | |||
| + | ===Gatekeeper=== | ||
| + | '''Weapons''' | ||
| + | *[[Atheon's Epilogue]] | ||
| + | *[[Praedyth's Timepiece]] | ||
| + | *[[Found Verdict]] | ||
| + | |||
| + | '''Armor''' | ||
| + | *[[Chest Armor]] | ||
| + | |||
| + | '''Inventory''' | ||
| + | *[[Legendary Engram]] | ||
| + | |||
| + | ===Atheon=== | ||
| + | '''Weapons''' | ||
| + | *[[Vex Mythoclast]] | ||
| + | *[[Atheon's Epilogue]] / [[Atheon's Epilogue (Adept)]] from Challenge Mode | ||
| + | *[[Fatebringer]] / [[Fatebringer (Adept)]] from Challenge Mode | ||
| + | *[[Praedyth's Timepiece]] / [[Praedyth's Timepiece (Adept)]] from Challenge Mode | ||
| + | *[[Vision of Confluence]] / [[Vision of Confluence (Adept)]] from Challenge Mode | ||
| + | When completing Challenge Mode, you are guaranteed one of the above Primary Adept Weapons. | ||
| + | |||
| + | '''Armor''' | ||
| + | *[[Helmets]] | ||
| + | |||
| + | '''Inventory''' | ||
| + | *[[Templar Shell]] | ||
| + | *[[XV1 Usurper]] - Sparrow | ||
| + | *[[Aspect of Glass]] - Ship | ||
| + | *[[Glass Minuet]] - Ship | ||
| + | *[[Timeglass]] - Shader | ||
| + | *[[Chatterwhite]] - Shader | ||
| + | *Guaranteed 1 [[Age of Triumph Ornament]] for Challenge Mode | ||
| + | *[[Glass and Time]] ([[Emblem]]) for Challenge Mode | ||
==Loot== | ==Loot== | ||
| + | {{see also|#Loot Table}} | ||
===Weapons=== | ===Weapons=== | ||
====Exotic Weapons==== | ====Exotic Weapons==== | ||
| Line 100: | Line 193: | ||
}} | }} | ||
===Other Items=== | ===Other Items=== | ||
| + | *[[Continuum Pin]] - [[Titan Artifact]] | ||
| + | *[[Oraclery]] - [[Hunter Artifact]] | ||
| + | *[[Chronofuse]] - [[Warlock Artifact]] | ||
| + | |||
| + | ==Weapon Loadout== | ||
| + | ===Building the Spire Weapon Loadout=== | ||
| + | '''Primary''': The main threat at the start of [[VoG]] are the yellow bar [[minotaur]]s that will rush your zones, called [[Praetorian]]s. [[Vex]] suffer additional damage from [[Explosive Round]]s, and [[Hand Cannons]] deliver the biggest ER punch of all the primary types. Thus, I'd recommend using a Hand Cannon with Explosive Rounds - your holy grail here is a [[Word of Crota (Adept)]], which pairs Explosive Rounds with [[Void]] damage, slapping a world of hurt on the Praetorians' shields. I wouldn't worry about a primary taking up your exotic slot at this stage, as there are no bosses to DPS. | ||
| + | *Avoid: anything with a low clip, such as low-RoF [[Pulse Rifles]], unless your reload speed is above par with perks and gear. You want to be stripping Praetorians of their shields, and low clip sizes are a liability in that regard. | ||
| + | |||
| + | '''Secondary''' As above, the main threat are those pesky yellow bars. I'd recommend a high-RoF [[Shotgun]] with [[Full Auto]] for this section (and indeed the first half of the raid). Something between [[The Comedian]] and the [[Proud Spire]] will do, bonus points if it comes with Void. Personally I use my OG Y2 [[Burden of Proof XI]] for VoG, as it has high range and a stupid good rate of fire. If you lack a decent shotty, then a fast-charging Void Fusion Rifle will assist you in laying down some close-range DPS on those big fellas. | ||
| + | *Avoid: Sniper Rifles. There isn't any significant ranged threat here that your primary can't take care of, and there are no bosses to use them on. | ||
| + | |||
| + | '''Heavy''': As above, you need something to take down big targets, fast. If your exotic slot isn't taken up already, you can't go wrong with [[Razelighter]] or [[Dark Drinker]]. If not, then Void [[Machine Guns]] should be your go-to. I use [[The Variable]], a Y2 mid-high RoF MG from [[Future War Cult]]. | ||
| + | *Avoid: [[Rocket Launchers]]. Mobs will get wayyyy too close to comfort, and you don't want to risk blowing yourself up. | ||
| + | |||
| + | ===Confluxes Weapon Loadout=== | ||
| + | '''Primary''': As above, your only real threat here will be ground troop Vex. An [[Explosive Rounds]] HC will be your best friend - bonus points for [[Firefly]] or [[Army of One]], as those [[perks]] will assist with the general cleanup. If you're defending the Left Conflux, you might want to consider using a Scout Rifle, as you'll have a long-range direct line of sight on a Vex spawn point. I'll be using my Word of Crota (Adept) for this stage, and sticking my butt on the right hand Conflux. | ||
| + | *Avoid: as before, anything with a low clip size that doesn't make up for it elsewhere. You don't want to be stuck reloading whilst a Minotaur sacrifices itself to the Conflux. Pulse Rifles can also be a liability when facing Hobgoblins, as you won't realize the full damage potential of your first trigger pull, and in any case all three (or four) shots won't hit the teensy crit spot. | ||
| + | |||
| + | '''Secondary''': As before, a good, fast, Void Shotgun will help you make the most of your green bricks, as you will be encountering a lot of enemies at close range. | ||
| + | *Avoid: [[Sniper Rifles]], as before, unless you're a wizard with snap-shotting [[Hobgoblin]]s on the left Conflux. | ||
| + | |||
| + | '''Heavy''': As before, you'll want your heavy to help you take out the tankier Vex targets. Razelighter, Dark-Drinker, Void MG's, anything that will make it easer to rapidly burn down minotaurs. If you're on the middle Conflux, you might want to consider running [[Gjallarhorn]], especially if you're a [[Defender]] [[Titan]] with orbs on heavy kills selected, or a Hunter running [[Skyburners Annex]]. You can generate a heck of a lot of orbs for your team this way. More [[supers]] = less stupid deaths = higher chance of success. | ||
| + | *Avoid: Nothing, really. If you're on the right Conflux I really wouldn't run a Rocket Launcher, but that's just me. | ||
| + | |||
| + | ===Oracles Weapon Loadout=== | ||
| + | '''Primary''': This is where things change up a bit. Hobgoblins will be spawning periodically on the edges of the arena, meaning you'll serve your team admirably by equipping a Scout Rifle that can disrupt or decapitate the buggars. At the same time, you need to be considering your ability to burn down the Oracles as quickly as possible - for this purpose I would recommend a high-RoF auto-rifle such as [[Arminius-D]], [[Doctrine of Passing]] or [[Atheon's Epilogue]] once we start grabbing them. Testing has shown that these weapons, short of using a heavy alternative, down them the fastest. An [[Atheon's Epilogue (Adept)]] will be my best friend once I get one as the Void damage really helps you with minotaurs to boot. Whether you go for long or range Primaries will depend on where you think your Secondary or Heavy priorities are. | ||
| + | |||
| + | '''Secondary''': if you're going for an auto rifle in your Primary slot, I'd recommend selecting a decent sniper rifle that can reload snappily, and one-shot Hobgoblins. I have high hopes for a Y3 [[Praedyth's Revenge]], but until then I'll be using a Void Ex Machina because I'm a PvE scrub. If you've got long range covered with your Primary, definitely consider a Full-Auto shotgun - Found Verdict will be ideal in this slot; I haven't recommended it yet because it deals Arc damage, and is sub-par against minotaur shields. Against Oracles though, it helps immensely. | ||
| + | Avoid: Fusion Rifles, because why would you do that to your team. | ||
| + | |||
| + | '''Heavy''': some people would recommend [[Super Good Advice]] for this section, as it will pump rounds non-stop into Oracles and burn them down reasonably quickly. Personally I avoid the damn thing, because it needlessly takes up an Exotic slot which you could spend elsewhere - if I see ANYBODY with access to an Atheon's Epilogue (Adept) using SGA, I'll be so, so sad. I may cry. Your legendary Primary or Secondary will be your greatest asset for Oracles - save the exotic slot for something like an elemental Primary, or, as above, using Gjallarhorn to generate a million, million orbs of light from the Fanatics which spawn in the middle between rounds. Heck, if you're worried about Oracles still then use [[Sleeper Simulant]], as it (currently) one-shots them provided you're fast enough. | ||
| + | *Avoid: [[swords]]. You don't want to use these against Fanatics. . . Data has said that Hand Cannons deal sub-par damage to Oracles (although I suppose that hasn't stopped me recommending them in the next section). | ||
| + | |||
| + | ===Templar Weapon Loadout=== | ||
| + | '''Primary''': anything that helps against [[Harpies]] and other vex at close range. I'd fall back on your Hand Cannons at this point, as they're snappy and will hopefully one-shot and / or stagger many of the Vex clustering about. You might find your auto rifles effective here, as you'll be needing to take down Oracles with some alacrity. | ||
| + | *Avoid: Pulse Rifles. DPS'ing the boss with your [[Chaos Dogma]] like an idiot. Exotic primaries. | ||
| + | |||
| + | '''Secondary''': If you don't own a Sleeper Simulant, use [[Black Spindle]] all the way. If one or both are lacking, make sure you have a decent PvE sniper rifle such as [[Thousand-Yard-Stare]] with [[Triple Tap]] and / or [[Casket Mag]], [[Spray and Play]] etc. Your secondary's role will be to DPS the boss. A member of your team may consider rocking a shotgun to help clear the mobs around the main group. | ||
| + | *Avoid: [[Fusion Rifles]]. Generally shotguns, although see the last point. | ||
| + | |||
| + | '''Heavy''': Sleeper Simulant will allow you the highest DPS against the Templar, and allows you to take potshots from behind cover - something that becomes a liability with [[Black Spindle]] as an alternative, which requires uninterrupted line-of-sight. It will also allow you to burn down Oracles fast. If you're lame, you can consider using Gjallarhorn, but just be aware that you're letting down your team DPS-wise (and you also run the risk of blowing yourself up when a Harpy / Containment Field gets in the way). If your exotic slot is taken up with Spindle, consider either an MG like [[Qullim's Terminus]], or an exotic sword to take some of the pressure off your team whilst waiting for the relic to charge. | ||
| + | *Avoid: Rocket Launchers. Seriously. If I see one more person blowing themselves up in a Containment Field. | ||
| + | |||
| + | ===Gorgons' Labyrinth Weapon Loadout=== | ||
| + | This is reasonably straightforward. If you're burning down Gorgons then use Sleepers, Swords and Gjallys, with Snipers and Shotguns to help lay the hurt when you run out of ammo. Your Primary is a triviality in this section. | ||
| + | |||
| + | ===Gatekeeper Weapon Loadout=== | ||
| + | '''Primary''': refer to the above sections on dealing with foot soldier Vex - you'll want something punchy that won't let you down. Explosive Rounds and Army of One are great perks for this section, as you'll be loosing many a grenade and fighting many a minotaur. | ||
| + | *Avoid: Exotic weapons; your exotic slot should be taken up with better weapons elsewhere, so don't even think about it. Pulse Rifles. Honestly. They just weren't made for this raid. | ||
| + | |||
| + | '''Secondary''': This one is up to you. You'll find that in the final part of this encounter you'll be up close and personal with yellow bar minotaurs, so consider a fast Shotgun as above. Alternatively if you're worried that your DPS against the Gatekeepers might suffer, use a PvE-oriented Sniper Rifle as above. | ||
| + | *Avoid: fusion rifles, exotic weapons unless you're more comfortable with Black Spindle over Gjally or Sleeper. | ||
| + | |||
| + | '''Heavy''': you'll be wanting to lay down the hurt on the Gatekeepers, so I really, really, highly recommend Sleeper Simulant. Back in the Lvl 32 version of the raid at 400 Light, it would take two Sleeper shots to down the Gatekeeper. Obviously we're not expecting that this time around, but be aware that it really is the most bang for your buck exotic-wise. If you don't have it or if you're an ignorant shit, use Gjallarhorn. If you don't have either, revert to a good Void MG for the last section with a Sniper Rifle on hand for DPS. | ||
| + | Avoid: Rocket Launchers. Things that aren't Sleeper Simulant. | ||
| + | |||
| + | ===Atheon Weapon Loadout=== | ||
| + | '''Primary''': as above, high-RoF auto rifles will assist you with taking out the Oracles in good time, and they happen to be very handy when fighting Supplicants close-range. | ||
| + | *Avoid: Hand Cannons, for aforementioned reasons. No Land Beyond (and other exotic primaries in general). | ||
| + | |||
| + | '''Secondary''': you'll be wanting a very good Sniper Rifle to back you up for when your Heavy expires. Black Spindle is a great option if you don't have good exotic heavies. Otherwise, a good Sniper with Triple Tap etc. | ||
| + | *Avoid: Shotguns, Fusion Rifles - they just aren't useful for DPS. | ||
| + | |||
| + | '''Heavy''': Sleeper Simulant is, of course, the Holy Grail. It was the only thing that could extremely consistently one-phase Atheon back in Year 2 other than an entire team of Celestial Nighthawks. I'd avoid Gjallarhorn as you will just blow yourself up like an idiot on the relic shield, unless your relic holder is smart enough to face away from Atheon (hot tip: they aren't), meaning that you'll be jump shotting and your rockets-per-second will be too low to take advantage of Gjally's primary strengths. See above musings on Super Good Advice - sure, use it for the Oracles but be aware that you are letting your team down to the max by not equipping something that can DPS Atheon. Your Sleeper Sim or Primary should be enough to get you past the Oracles, and if they're not then you need to have a serious word with the rest of your team as to why they aren't also shooting the Oracles. | ||
| + | *Avoid: Super Good Advice, swords, rocket launchers in general. | ||
| + | |||
| + | ==Strategy Guide== | ||
| + | ===Confluxes=== | ||
| + | |||
| + | ===Oracles=== | ||
| + | '''Updated Oracle Spawn Order ''' | ||
| + | {| class="wikitable" style= "text-align: center" | ||
| + | |- | ||
| + | | || '''1''' || '''2''' || '''3''' || '''4''' || '''5''' || '''6''' || '''7''' || '''8''' || '''9''' | ||
| + | |- | ||
| + | |'''Wave 1''' || Mid || R2 || R1 || L2 || L1 || L3 || R1 || R2 || R3 | ||
| + | |- | ||
| + | |'''Wave 2''' || L1 || R3 || R1 || L3 || Mid || L2 || R2 || || | ||
| + | |- | ||
| + | |'''Wave 3''' || R1 || L1 || R2 || L2 || Mid || L3 || R3 || || | ||
| + | |- | ||
| + | |'''Wave 4''' || R3 || L2 || R2 || L3 || R1 || L1 || Mid || R3 || L2 | ||
| + | |- | ||
| + | |} | ||
| + | |||
| + | If you are unfamiliar with these style of callouts, check out this image http://i.imgur.com/FptYmRm.png | ||
| + | |||
| + | ===Templar=== | ||
| + | |||
| + | ===Gorgon's Maze=== | ||
| + | '''Notes''' | ||
| + | *Gorgons do not respawn. Kill one and it stays dead until you wipe or are victorious | ||
| + | *Avoid fighting gorgons against walls/corners at all costs. It seems they move around or bounce far away if pushed in by DPS. Swords in particular. So to adjust we did... | ||
| + | *The reason to use melting point over tether is because melting point + simmering flames gives you your melee charge back almost instantly and you can keep melting pointing gorgons in quick succession (aside from popping synths) where as for tether, you can use it on one and then have to wait a long time for it to come back. | ||
| + | *Tether does not stack with melting point and takes it over if used at the same time. | ||
| + | *First off, the gorgons have massive health (not surprising) | ||
| + | *Secondly, the gorgons (sometimes) seem to "bounce" around when taking damage, specifically when backed up against a wall. Avoid this when possible. | ||
| + | *Third the gorgons now kill you faster in the gaze than originally in VOG. | ||
| + | |||
| + | '''Team Comp''' | ||
| + | |||
| + | Ideally what you want to do for this is have a fireteam setup of 2/2/2 | ||
| + | |||
| + | *2 [[Sunsinger]]s | ||
| + | *2 [[Hunter]]s ([[Celestial Nighthawk]]s for both if possible, if not at least a nighthawk and tether) -- Nighthawk does about 40% damage to gorgons | ||
| + | *2 [[Titan]]s using [[Melting Point]] and [[Simmering Flames]] on hammers The ideal setup to take out each gorgon is.... | ||
| + | |||
| + | '''Steps''' | ||
| + | #Isolate each gorgon by themselves away from the rest even if it takes time to set it up | ||
| + | #Have a titan with melting point go aggro and punch the gorgon | ||
| + | #Once your titan has applied melting point, have him go BEHIND the gorgon. this is to make sure that a gorgon is not going to float against a wall (because it will bounce and that will get you killed) Once you are behind it you can all proceed to DPS | ||
| + | #Have a hunter use golden gun with nighthawk on the gorgon once the melting point has been applied (if you have your super) | ||
| + | #Once the melting point/tether is applied, use exotic swords to maximize damage and more importantly ammo count (ammo plays a big part in how long you'll be doing this for) [[Raze-Lighter]] is the best but dark drinker can get the job done as well. Avoid using bolt caster. If you have the radegast artifact, i would highly suggest putting that on as it gives you an extra 20 sword ammo that can be crucial. Once you are on low ammo count for your swords, it is best to wait for your synths to come back and to also have your nighthawks lined up in tune with having ammo and such. rinse and repeat these steps with each gorgon and you will eventually accomplish this annoying feat of clearing the maze of all gorgons. | ||
| + | |||
| + | ===Gatekeeper=== | ||
| + | |||
| + | ===Atheon=== | ||
| + | [[File:atheon mars and venus oracles visual guide1.jpg|thumb|center|Mars and Venus Oracles Visual Guide]] | ||
| + | |||
| + | ===New Mechanics=== | ||
| + | '''Spire''': Nothing changed here. | ||
| + | |||
| + | '''Entering the Vault''': If you follow the path below the first chest (the path we follow to get the first Ghost at Paradox Mission to do the alternate ending), you will find a new chest. This chest had only fragments inside them, from old raids. Check it when the VoG feature the Weekly Raid. | ||
| + | |||
| + | '''Templar's Well''': Here some changes has been made in old safe places. | ||
| + | *'''Structure''': | ||
| + | *We cannot do the Oracles from the top anymore. | ||
| + | *The safe spot above the Templar is a timed death zone now, with a counter of "Turn Back". | ||
| + | *The room to the left of the Templar is closed now and only opens when we kill the Templar. | ||
| + | *The stone platform in front of the left room its higher now and we can't jump over it. (another "Turn Back" zone if you go much higher). | ||
| + | *'''Mechanics (Confluxes/Oracles)''': | ||
| + | *The Oracles now appear faster and in a higher number than usual | ||
| + | *Harpies now explode if you approach them, like the Suplicants from Atheon. | ||
| + | *The Cleaning Well still there to purify us. | ||
| + | *This phase ends faster due to the quickness of the Oracles spawn time and the amount of Oracles at a time. | ||
| + | '''Templar's Encounter''': | ||
| + | *The Templar's Oracles are RED, like the ones that appear at Atheon's Time Gates. Losing one means a Wipe. The Aegis cannot protect you from that. | ||
| + | *The Templar teleports in less time now. | ||
| + | *'''Down to the Gorgon Labyrinth''': We didn't find anything new here, using the two paths possible. | ||
| + | *'''Gorgon's Labyrinth''': We got the two chests but didn't find anything new here too. | ||
| + | *'''Vault Of Glass - Jump Puzzle''': Nothing abnormal here. | ||
| + | *'''Throne of Glass''': | ||
| + | *'''Gatekeeper Encounter''': | ||
| + | **The Gatekeeper teleports faster if receive a certain amount of damage. | ||
| + | **A third Aegis appeared after we killed the Gatekeeper (the first one, outside the portals). We didn't manage to discover its function, as the encounter proceeded the same way it used to be. Maybe its use is disabled until the Raid is the Weekly. | ||
| + | *'''Atheon's Encounter''': | ||
| + | *The only change we noted is that the Oracles are in minor number, but appear faster. | ||
==Images== | ==Images== | ||
Latest revision as of 02:50, 25 April 2017
| Vault of Glass (Age of Triumph) | |
|---|---|
| Information | |
| Type | Raid |
| Location | Venus |
| Players | 6 |
| Tier 1 Level | 390 |
Introduction
Vault of Glass (Age of Triumph) is the Light Level 390 version of Vault of Glass released in Age of Triumph.
Challenge Modes
Templar Challenge
Block each teleport phase. Relic was only held by 1 Guardian throughout this phase. Teleport can be blocked by Guardians, not just the Relic holder by standing in his teleport 'circle' which appears before he goes.
Atheon Challenge
When teleported, each Guardian can only kill 1 Oracle. There are 6 Oracles total on Mars / Venus. This means, the Guardians who DO NOT get teleported initially must go INSIDE the portal (Leaving someone outside to keep it open) to kill an Oracle each to complete the Challenge - In addition to this, if a Guardian dies without killing an Oracle first and you DO NOT kill Atheon, Challenge Failed as that would mean there isn't a 6th for an Oracle.
- Aegis blast can kill an Oralce (Relic Holder SGA)
Loot Table
- See also: #Loot
Trials of Kabr
Chest
- Class Item
- Guaranteed Legendary Engram
- Knuckles of Eao
- Chance for Exotic
- Chance for Artifact
Templar's Well
Chest
- Class Item
- Chance for Exotic
- Chance for Artifact
Confluxes
- Class Item
- Legendary Engram
- Chance for Exotic
- Weapon Parts
Oracles
- Class Item
- Guaranteed Legendary Engram
- Chance for Exotic
- Weapon Parts
Templar
Weapons
- Found Verdict
- Hezen Vengeance
- Praedyth's Revenge
- Praetorian Foil
- Atheon's Epilogue / Atheon's Epilogue (Adept) from Challenge Mode
- Fatebringer / Fatebringer (Adept) from Challenge Mode
- Praedyth's Timepiece / Praedyth's Timepiece (Adept) from Challenge Mode
- Vision of Confluence / Vision of Confluence (Adept) from Challenge Mode
When completing Challenge Mode, you are guaranteed one of the above Primary Adept Weapons.
Armor
Inventory
- Guaranteed 1 Age of Triumph Ornament and Collapse of Space (Emblem) for Challenge Mode Completion
Gorgon's Maze
Chest 1
- Guaranteed Legendary Engram
- Chance for Exotic
Chest 2
- Chance for Exotic
- Chance for Artifact
- Weapon Parts
Gatekeeper
Weapons
Armor
Inventory
Atheon
Weapons
- Vex Mythoclast
- Atheon's Epilogue / Atheon's Epilogue (Adept) from Challenge Mode
- Fatebringer / Fatebringer (Adept) from Challenge Mode
- Praedyth's Timepiece / Praedyth's Timepiece (Adept) from Challenge Mode
- Vision of Confluence / Vision of Confluence (Adept) from Challenge Mode
When completing Challenge Mode, you are guaranteed one of the above Primary Adept Weapons.
Armor
Inventory
- Templar Shell
- XV1 Usurper - Sparrow
- Aspect of Glass - Ship
- Glass Minuet - Ship
- Timeglass - Shader
- Chatterwhite - Shader
- Guaranteed 1 Age of Triumph Ornament for Challenge Mode
- Glass and Time (Emblem) for Challenge Mode
Loot
- See also: #Loot Table
Weapons
Exotic Weapons
| Weapon | Type | Damage Type | Attack | Impact | Rate of Fire | Range | Stability | Reload | Magazine |
|---|---|---|---|---|---|---|---|---|---|
| Atheon's Epilogue (Adept) | Auto Rifles | Void | 400 | 2 | 100 | 15 | 34 | 71 | 60 |
| Vex Mythoclast (Year 3) | Fusion Rifles | Solar | 400 | 35 | 49 | 50 | 72 | 21 | |
| Fatebringer (Adept) | Hand Cannons | Arc | 320–400 | 81 | 22 | 40 | 32–38 | 33–43 | 12 |
| Praedyth's Timepiece (Adept) | Pulse Rifles | Arc | 320–400 | 4 | 77 | 25–31 | 64–88 | 54–68 | 30 |
| Vision of Confluence (Adept) | Scout Rifles | Solar | 320–400 | 48 | 37 | 59–63 | 57–84 | 64–73 | 19 |
Legendary Weapons
| Weapon | Type | Damage Type | Attack | Impact | Rate of Fire | Range | Stability | Reload | Magazine |
|---|---|---|---|---|---|---|---|---|---|
| Atheon's Epilogue (Year 3) | Auto Rifles | Kinetic | 365–400 | 2 | 100 | 15–20 | 34–60 | 70–91 | 60 |
| Praetorian Foil (Year 3) | Fusion Rifles | Solar | 365–400 | 91–97 | 47–65 | 33–60 | 55–61 | 5 | |
| Fatebringer (Year 3) | Hand Cannons | Kinetic | 365–400 | 81 | 22 | 40 | 32–38 | 33–43 | 12 |
| Corrective Measure (Year 3) | Machine Guns | Void | 365–400 | 27–31 | 88 | 18–22 | 38–79 | 39 | 58 |
| Praedyth's Timepiece (Year 3) | Pulse Rifles | Kinetic | 365–400 | 4 | 77 | 25–31 | 64–88 | 54–68 | 30 |
| Hezen Vengeance (Year 3) | Rocket Launchers | Solar | 365–400 | 4 | 24–43 | 62–76 | 2 | ||
| Vision of Confluence (Year 3) | Scout Rifles | Kinetic | 365–400 | 48 | 37 | 59–63 | 57–84 | 64–73 | 19 |
| Found Verdict (Year 3) | Shotguns | Arc | 365–400 | 61–64 | 14 | 18–32 | 13–42 | 40 | 6 |
| Praedyth's Revenge (Year 3) | Sniper Rifles | Void | 365–400 | 16 | 37 | 66–77 | 79–100 | 71–92 | 4 |
Armor
Titan Armor
| Type | Defense | Discipline | Intellect | Strength | |
|---|---|---|---|---|---|
| Battlecage of Kabr (Year 3) | Helmets | 365–400 | 38–65 | 38–65 | 38–65 |
| Kabr's Brazen Grips (Year 3) | Gauntlets | 365–400 | 34–58 | 34–58 | 34–58 |
| Kabr's Forceful Greaves (Year 3) | Leg Armor | 365–400 | 47–79 | 47–79 | 47–79 |
| Kabr's Wrath (Year 3) | Chest Armor | 365–400 | 51–86 | 51–86 | 51–86 |
| Light of the Great Prism (Year 3) | Titan Marks | 365–400 | 21–35 | 21–35 | 21–35 |
Hunter Armor
| Type | Defense | Discipline | Intellect | Strength | |
|---|---|---|---|---|---|
| Prime Zealot Cuirass (Year 3) | Chest Armor | 365–400 | 51–86 | 51–86 | 51–86 |
| Prime Zealot Gloves (Year 3) | Gauntlets | 365–400 | 34–58 | 34–58 | 34–58 |
| Prime Zealot Greaves (Year 3) | Leg Armor | 365–400 | 47–79 | 47–79 | 47–79 |
| Prime Zealot Helm (Year 3) | Helmets | 365–400 | 38–65 | 38–65 | 38–65 |
| Shattered Vault Cloak (Year 3) | Hunter Cloaks | 365–400 | 21–35 | 21–35 | 21–35 |
Warlock Armor
| Type | Defense | Discipline | Intellect | Strength | |
|---|---|---|---|---|---|
| Cuirass of the Hezen Lords (Year 3) | Chest Armor | 365–400 | 51–86 | 51–86 | 51–86 |
| Facade of the Hezen Lords (Year 3) | Helmets | 365–400 | 38–65 | 38–65 | 38–65 |
| Fragment of the Prime (Year 3) | Warlock Bonds | 365–400 | 21–35 | 21–35 | 21–35 |
| Gloves of the Hezen Lords (Year 3) | Gauntlets | 365–400 | 34–58 | 34–58 | 34–58 |
| Tread of the Hezen Lords (Year 3) | Leg Armor | 365–400 | 47–79 | 47–79 | 47–79 |
Other Items
Weapon Loadout
Building the Spire Weapon Loadout
Primary: The main threat at the start of VoG are the yellow bar minotaurs that will rush your zones, called Praetorians. Vex suffer additional damage from Explosive Rounds, and Hand Cannons deliver the biggest ER punch of all the primary types. Thus, I'd recommend using a Hand Cannon with Explosive Rounds - your holy grail here is a Word of Crota (Adept), which pairs Explosive Rounds with Void damage, slapping a world of hurt on the Praetorians' shields. I wouldn't worry about a primary taking up your exotic slot at this stage, as there are no bosses to DPS.
- Avoid: anything with a low clip, such as low-RoF Pulse Rifles, unless your reload speed is above par with perks and gear. You want to be stripping Praetorians of their shields, and low clip sizes are a liability in that regard.
Secondary As above, the main threat are those pesky yellow bars. I'd recommend a high-RoF Shotgun with Full Auto for this section (and indeed the first half of the raid). Something between The Comedian and the Proud Spire will do, bonus points if it comes with Void. Personally I use my OG Y2 Burden of Proof XI for VoG, as it has high range and a stupid good rate of fire. If you lack a decent shotty, then a fast-charging Void Fusion Rifle will assist you in laying down some close-range DPS on those big fellas.
- Avoid: Sniper Rifles. There isn't any significant ranged threat here that your primary can't take care of, and there are no bosses to use them on.
Heavy: As above, you need something to take down big targets, fast. If your exotic slot isn't taken up already, you can't go wrong with Razelighter or Dark Drinker. If not, then Void Machine Guns should be your go-to. I use The Variable, a Y2 mid-high RoF MG from Future War Cult.
- Avoid: Rocket Launchers. Mobs will get wayyyy too close to comfort, and you don't want to risk blowing yourself up.
Confluxes Weapon Loadout
Primary: As above, your only real threat here will be ground troop Vex. An Explosive Rounds HC will be your best friend - bonus points for Firefly or Army of One, as those perks will assist with the general cleanup. If you're defending the Left Conflux, you might want to consider using a Scout Rifle, as you'll have a long-range direct line of sight on a Vex spawn point. I'll be using my Word of Crota (Adept) for this stage, and sticking my butt on the right hand Conflux.
- Avoid: as before, anything with a low clip size that doesn't make up for it elsewhere. You don't want to be stuck reloading whilst a Minotaur sacrifices itself to the Conflux. Pulse Rifles can also be a liability when facing Hobgoblins, as you won't realize the full damage potential of your first trigger pull, and in any case all three (or four) shots won't hit the teensy crit spot.
Secondary: As before, a good, fast, Void Shotgun will help you make the most of your green bricks, as you will be encountering a lot of enemies at close range.
- Avoid: Sniper Rifles, as before, unless you're a wizard with snap-shotting Hobgoblins on the left Conflux.
Heavy: As before, you'll want your heavy to help you take out the tankier Vex targets. Razelighter, Dark-Drinker, Void MG's, anything that will make it easer to rapidly burn down minotaurs. If you're on the middle Conflux, you might want to consider running Gjallarhorn, especially if you're a Defender Titan with orbs on heavy kills selected, or a Hunter running Skyburners Annex. You can generate a heck of a lot of orbs for your team this way. More supers = less stupid deaths = higher chance of success.
- Avoid: Nothing, really. If you're on the right Conflux I really wouldn't run a Rocket Launcher, but that's just me.
Oracles Weapon Loadout
Primary: This is where things change up a bit. Hobgoblins will be spawning periodically on the edges of the arena, meaning you'll serve your team admirably by equipping a Scout Rifle that can disrupt or decapitate the buggars. At the same time, you need to be considering your ability to burn down the Oracles as quickly as possible - for this purpose I would recommend a high-RoF auto-rifle such as Arminius-D, Doctrine of Passing or Atheon's Epilogue once we start grabbing them. Testing has shown that these weapons, short of using a heavy alternative, down them the fastest. An Atheon's Epilogue (Adept) will be my best friend once I get one as the Void damage really helps you with minotaurs to boot. Whether you go for long or range Primaries will depend on where you think your Secondary or Heavy priorities are.
Secondary: if you're going for an auto rifle in your Primary slot, I'd recommend selecting a decent sniper rifle that can reload snappily, and one-shot Hobgoblins. I have high hopes for a Y3 Praedyth's Revenge, but until then I'll be using a Void Ex Machina because I'm a PvE scrub. If you've got long range covered with your Primary, definitely consider a Full-Auto shotgun - Found Verdict will be ideal in this slot; I haven't recommended it yet because it deals Arc damage, and is sub-par against minotaur shields. Against Oracles though, it helps immensely. Avoid: Fusion Rifles, because why would you do that to your team.
Heavy: some people would recommend Super Good Advice for this section, as it will pump rounds non-stop into Oracles and burn them down reasonably quickly. Personally I avoid the damn thing, because it needlessly takes up an Exotic slot which you could spend elsewhere - if I see ANYBODY with access to an Atheon's Epilogue (Adept) using SGA, I'll be so, so sad. I may cry. Your legendary Primary or Secondary will be your greatest asset for Oracles - save the exotic slot for something like an elemental Primary, or, as above, using Gjallarhorn to generate a million, million orbs of light from the Fanatics which spawn in the middle between rounds. Heck, if you're worried about Oracles still then use Sleeper Simulant, as it (currently) one-shots them provided you're fast enough.
- Avoid: swords. You don't want to use these against Fanatics. . . Data has said that Hand Cannons deal sub-par damage to Oracles (although I suppose that hasn't stopped me recommending them in the next section).
Templar Weapon Loadout
Primary: anything that helps against Harpies and other vex at close range. I'd fall back on your Hand Cannons at this point, as they're snappy and will hopefully one-shot and / or stagger many of the Vex clustering about. You might find your auto rifles effective here, as you'll be needing to take down Oracles with some alacrity.
- Avoid: Pulse Rifles. DPS'ing the boss with your Chaos Dogma like an idiot. Exotic primaries.
Secondary: If you don't own a Sleeper Simulant, use Black Spindle all the way. If one or both are lacking, make sure you have a decent PvE sniper rifle such as Thousand-Yard-Stare with Triple Tap and / or Casket Mag, Spray and Play etc. Your secondary's role will be to DPS the boss. A member of your team may consider rocking a shotgun to help clear the mobs around the main group.
- Avoid: Fusion Rifles. Generally shotguns, although see the last point.
Heavy: Sleeper Simulant will allow you the highest DPS against the Templar, and allows you to take potshots from behind cover - something that becomes a liability with Black Spindle as an alternative, which requires uninterrupted line-of-sight. It will also allow you to burn down Oracles fast. If you're lame, you can consider using Gjallarhorn, but just be aware that you're letting down your team DPS-wise (and you also run the risk of blowing yourself up when a Harpy / Containment Field gets in the way). If your exotic slot is taken up with Spindle, consider either an MG like Qullim's Terminus, or an exotic sword to take some of the pressure off your team whilst waiting for the relic to charge.
- Avoid: Rocket Launchers. Seriously. If I see one more person blowing themselves up in a Containment Field.
Gorgons' Labyrinth Weapon Loadout
This is reasonably straightforward. If you're burning down Gorgons then use Sleepers, Swords and Gjallys, with Snipers and Shotguns to help lay the hurt when you run out of ammo. Your Primary is a triviality in this section.
Gatekeeper Weapon Loadout
Primary: refer to the above sections on dealing with foot soldier Vex - you'll want something punchy that won't let you down. Explosive Rounds and Army of One are great perks for this section, as you'll be loosing many a grenade and fighting many a minotaur.
- Avoid: Exotic weapons; your exotic slot should be taken up with better weapons elsewhere, so don't even think about it. Pulse Rifles. Honestly. They just weren't made for this raid.
Secondary: This one is up to you. You'll find that in the final part of this encounter you'll be up close and personal with yellow bar minotaurs, so consider a fast Shotgun as above. Alternatively if you're worried that your DPS against the Gatekeepers might suffer, use a PvE-oriented Sniper Rifle as above.
- Avoid: fusion rifles, exotic weapons unless you're more comfortable with Black Spindle over Gjally or Sleeper.
Heavy: you'll be wanting to lay down the hurt on the Gatekeepers, so I really, really, highly recommend Sleeper Simulant. Back in the Lvl 32 version of the raid at 400 Light, it would take two Sleeper shots to down the Gatekeeper. Obviously we're not expecting that this time around, but be aware that it really is the most bang for your buck exotic-wise. If you don't have it or if you're an ignorant shit, use Gjallarhorn. If you don't have either, revert to a good Void MG for the last section with a Sniper Rifle on hand for DPS. Avoid: Rocket Launchers. Things that aren't Sleeper Simulant.
Atheon Weapon Loadout
Primary: as above, high-RoF auto rifles will assist you with taking out the Oracles in good time, and they happen to be very handy when fighting Supplicants close-range.
- Avoid: Hand Cannons, for aforementioned reasons. No Land Beyond (and other exotic primaries in general).
Secondary: you'll be wanting a very good Sniper Rifle to back you up for when your Heavy expires. Black Spindle is a great option if you don't have good exotic heavies. Otherwise, a good Sniper with Triple Tap etc.
- Avoid: Shotguns, Fusion Rifles - they just aren't useful for DPS.
Heavy: Sleeper Simulant is, of course, the Holy Grail. It was the only thing that could extremely consistently one-phase Atheon back in Year 2 other than an entire team of Celestial Nighthawks. I'd avoid Gjallarhorn as you will just blow yourself up like an idiot on the relic shield, unless your relic holder is smart enough to face away from Atheon (hot tip: they aren't), meaning that you'll be jump shotting and your rockets-per-second will be too low to take advantage of Gjally's primary strengths. See above musings on Super Good Advice - sure, use it for the Oracles but be aware that you are letting your team down to the max by not equipping something that can DPS Atheon. Your Sleeper Sim or Primary should be enough to get you past the Oracles, and if they're not then you need to have a serious word with the rest of your team as to why they aren't also shooting the Oracles.
- Avoid: Super Good Advice, swords, rocket launchers in general.
Strategy Guide
Confluxes
Oracles
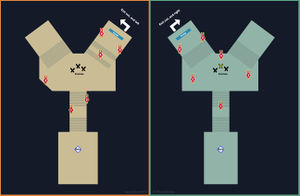
Updated Oracle Spawn Order
| 1 | 2 | 3 | 4 | 5 | 6 | 7 | 8 | 9 | |
| Wave 1 | Mid | R2 | R1 | L2 | L1 | L3 | R1 | R2 | R3 |
| Wave 2 | L1 | R3 | R1 | L3 | Mid | L2 | R2 | ||
| Wave 3 | R1 | L1 | R2 | L2 | Mid | L3 | R3 | ||
| Wave 4 | R3 | L2 | R2 | L3 | R1 | L1 | Mid | R3 | L2 |
If you are unfamiliar with these style of callouts, check out this image http://i.imgur.com/FptYmRm.png
Templar
Gorgon's Maze
Notes
- Gorgons do not respawn. Kill one and it stays dead until you wipe or are victorious
- Avoid fighting gorgons against walls/corners at all costs. It seems they move around or bounce far away if pushed in by DPS. Swords in particular. So to adjust we did...
- The reason to use melting point over tether is because melting point + simmering flames gives you your melee charge back almost instantly and you can keep melting pointing gorgons in quick succession (aside from popping synths) where as for tether, you can use it on one and then have to wait a long time for it to come back.
- Tether does not stack with melting point and takes it over if used at the same time.
- First off, the gorgons have massive health (not surprising)
- Secondly, the gorgons (sometimes) seem to "bounce" around when taking damage, specifically when backed up against a wall. Avoid this when possible.
- Third the gorgons now kill you faster in the gaze than originally in VOG.
Team Comp
Ideally what you want to do for this is have a fireteam setup of 2/2/2
- 2 Sunsingers
- 2 Hunters (Celestial Nighthawks for both if possible, if not at least a nighthawk and tether) -- Nighthawk does about 40% damage to gorgons
- 2 Titans using Melting Point and Simmering Flames on hammers The ideal setup to take out each gorgon is....
Steps
- Isolate each gorgon by themselves away from the rest even if it takes time to set it up
- Have a titan with melting point go aggro and punch the gorgon
- Once your titan has applied melting point, have him go BEHIND the gorgon. this is to make sure that a gorgon is not going to float against a wall (because it will bounce and that will get you killed) Once you are behind it you can all proceed to DPS
- Have a hunter use golden gun with nighthawk on the gorgon once the melting point has been applied (if you have your super)
- Once the melting point/tether is applied, use exotic swords to maximize damage and more importantly ammo count (ammo plays a big part in how long you'll be doing this for) Raze-Lighter is the best but dark drinker can get the job done as well. Avoid using bolt caster. If you have the radegast artifact, i would highly suggest putting that on as it gives you an extra 20 sword ammo that can be crucial. Once you are on low ammo count for your swords, it is best to wait for your synths to come back and to also have your nighthawks lined up in tune with having ammo and such. rinse and repeat these steps with each gorgon and you will eventually accomplish this annoying feat of clearing the maze of all gorgons.
Gatekeeper
Atheon
New Mechanics
Spire: Nothing changed here.
Entering the Vault: If you follow the path below the first chest (the path we follow to get the first Ghost at Paradox Mission to do the alternate ending), you will find a new chest. This chest had only fragments inside them, from old raids. Check it when the VoG feature the Weekly Raid.
Templar's Well: Here some changes has been made in old safe places.
- Structure:
- We cannot do the Oracles from the top anymore.
- The safe spot above the Templar is a timed death zone now, with a counter of "Turn Back".
- The room to the left of the Templar is closed now and only opens when we kill the Templar.
- The stone platform in front of the left room its higher now and we can't jump over it. (another "Turn Back" zone if you go much higher).
- Mechanics (Confluxes/Oracles):
- The Oracles now appear faster and in a higher number than usual
- Harpies now explode if you approach them, like the Suplicants from Atheon.
- The Cleaning Well still there to purify us.
- This phase ends faster due to the quickness of the Oracles spawn time and the amount of Oracles at a time.
Templar's Encounter:
- The Templar's Oracles are RED, like the ones that appear at Atheon's Time Gates. Losing one means a Wipe. The Aegis cannot protect you from that.
- The Templar teleports in less time now.
- Down to the Gorgon Labyrinth: We didn't find anything new here, using the two paths possible.
- Gorgon's Labyrinth: We got the two chests but didn't find anything new here too.
- Vault Of Glass - Jump Puzzle: Nothing abnormal here.
- Throne of Glass:
- Gatekeeper Encounter:
- The Gatekeeper teleports faster if receive a certain amount of damage.
- A third Aegis appeared after we killed the Gatekeeper (the first one, outside the portals). We didn't manage to discover its function, as the encounter proceeded the same way it used to be. Maybe its use is disabled until the Raid is the Weekly.
- Atheon's Encounter:
- The only change we noted is that the Oracles are in minor number, but appear faster.
