Difference between revisions of "Crota's End (Age of Triumph)"
m (Expanded loot tables and added challenge info.) |
(→Crota Loadout) |
||
| (17 intermediate revisions by 2 users not shown) | |||
| Line 11: | Line 11: | ||
|Gold Tier= | |Gold Tier= | ||
|Description= He waits in the dark below. | |Description= He waits in the dark below. | ||
| − | }}==Lore== | + | }} |
| − | + | {{TOCRIGHT}} | |
| + | ==Lore== | ||
''My name is Eriana-3, disciple of the Praxic Warlocks, marked by the Cormorant Seal. Survivor of the great disaster: the day we set out to retake our moon, united in a host of thousands, and found ourselves outmatched by one Hive champion of unspeakable power...'' - Eriana-3 | ''My name is Eriana-3, disciple of the Praxic Warlocks, marked by the Cormorant Seal. Survivor of the great disaster: the day we set out to retake our moon, united in a host of thousands, and found ourselves outmatched by one Hive champion of unspeakable power...'' - Eriana-3 | ||
| − | |||
| − | |||
__TOC__ | __TOC__ | ||
| − | |||
==Introduction== | ==Introduction== | ||
| + | [[Crota's End (Age of Triumph)]] is the [[Light]] [[Level]] 390 version of [[Crota's End]] released in [[Age of Triumph]]. | ||
==Challenge Modes== | ==Challenge Modes== | ||
| Line 51: | Line 50: | ||
Enjoy your loot. | Enjoy your loot. | ||
| − | ==Loot | + | ==Loot Table== |
| − | + | {{see also|#Loot}} | |
===The Abyss=== | ===The Abyss=== | ||
| Line 265: | Line 264: | ||
| style="padding:10px;"| No | | style="padding:10px;"| No | ||
| style="padding:10px;"| [[White Nail]] | | style="padding:10px;"| [[White Nail]] | ||
| − | | style="padding:10px;"| | + | | style="padding:10px;"| Yes |
|- | |- | ||
| style="padding:5px;"| [[file: Abyss defiant year 3 icon1.jpg|70px|link=Abyss Defiant (Year 3)]] | | style="padding:5px;"| [[file: Abyss defiant year 3 icon1.jpg|70px|link=Abyss Defiant (Year 3)]] | ||
| Line 309: | Line 308: | ||
| style="padding:10px;"| N/A | | style="padding:10px;"| N/A | ||
| style="padding:10px;"| No | | style="padding:10px;"| No | ||
| − | | style="padding:10px;"| | + | | style="padding:10px;"| [[Hive Disruptor]] |
| style="padding:10px;"| No | | style="padding:10px;"| No | ||
|- | |- | ||
| Line 656: | Line 655: | ||
| style="padding:10px;"| N/A | | style="padding:10px;"| N/A | ||
|} | |} | ||
| + | |||
| + | ==Loot== | ||
| + | {{see also|#Loot Table}} | ||
| + | ===Weapons=== | ||
| + | ====Exotic Weapons==== | ||
| + | {{#ask: [[Category:Weapons]] [[Category:Exotic]] [[Category:Crota's End (Age of Triumph)]] | ||
| + | | ?Type | ||
| + | | ?Damage Type | ||
| + | | ?Attack#- | ||
| + | | ?Impact#- | ||
| + | | ?Rate of Fire#- | ||
| + | | ?Range#- | ||
| + | | ?Stability#- | ||
| + | | ?Reload#- | ||
| + | | ?Magazine#- | ||
| + | | headers = plain | ||
| + | | mainlabel = Weapon | ||
| + | | sort = Type | ||
| + | | link = all | ||
| + | | class= sortable wikitable smwtable | ||
| + | | limit = 9999 | ||
| + | }} | ||
| + | |||
| + | ====Legendary Weapons==== | ||
| + | {{#ask: [[Category:Weapons]] [[Category:Legendary]] [[Category:Crota's End (Age of Triumph)]] | ||
| + | | ?Type | ||
| + | | ?Damage Type | ||
| + | | ?Attack#- | ||
| + | | ?Impact#- | ||
| + | | ?Rate of Fire#- | ||
| + | | ?Range#- | ||
| + | | ?Stability#- | ||
| + | | ?Reload#- | ||
| + | | ?Magazine#- | ||
| + | | headers = plain | ||
| + | | mainlabel = Weapon | ||
| + | | sort = Type | ||
| + | | link = all | ||
| + | | class= sortable wikitable smwtable | ||
| + | | limit = 9999 | ||
| + | }} | ||
| + | ===Armor=== | ||
| + | ====Titan Armor==== | ||
| + | {{#ask: [[Category:Armor]] [[Category:Titan Armor]] [[Category:Crota's End (Age of Triumph)]] | ||
| + | | ?Type | ||
| + | | ?Defense#- | ||
| + | | ?Discipline#- | ||
| + | | ?Intellect#- | ||
| + | | ?Strength#- | ||
| + | | headers = plain | ||
| + | | link = all | ||
| + | | limit = 9999 | ||
| + | | class= sortable wikitable smwtable | ||
| + | }} | ||
| + | ====Hunter Armor==== | ||
| + | {{#ask: [[Category:Armor]] [[Category:Hunter Armor]] [[Category:Crota's End (Age of Triumph)]] | ||
| + | | ?Type | ||
| + | | ?Defense#- | ||
| + | | ?Discipline#- | ||
| + | | ?Intellect#- | ||
| + | | ?Strength#- | ||
| + | | headers = plain | ||
| + | | link = all | ||
| + | | limit = 9999 | ||
| + | | class= sortable wikitable smwtable | ||
| + | }} | ||
| + | ====Warlock Armor==== | ||
| + | {{#ask: [[Category:Armor]] [[Category:Warlock Armor]] [[Category:Crota's End (Age of Triumph)]] | ||
| + | | ?Type | ||
| + | | ?Defense#- | ||
| + | | ?Discipline#- | ||
| + | | ?Intellect#- | ||
| + | | ?Strength#- | ||
| + | | headers = plain | ||
| + | | link = all | ||
| + | | limit = 9999 | ||
| + | | class= sortable wikitable smwtable | ||
| + | }} | ||
| + | ===Other Items=== | ||
| + | *[[Oversoul's Pang]] - [[Titan Artifact]] | ||
| + | *[[Oversoul's Scream]] - [[Hunter Artifact]] | ||
| + | *[[Oversoul's Gasp]] - [[Warlock Artifact]] | ||
| + | |||
| + | ==Weapon Loadout== | ||
| + | ===The Abyss Loadout=== | ||
| + | '''Primary''': your main adversary for the majority of this section (for the purposes of your [[Primary Weapon]], anyway) will be [[Thrall]]. Lots and lots of Thrall. Anything you own that has [[Firefly]], [[Explosive Rounds]] or both - hello, [[Fatebringer]] - will decimate the Abyss' native Thrall population with ease. Personally I'm a fan of [[Genesis Chain]], as it can mow through legions of the buggars with ease and makes lots of pretty, though less impactful, Firefly explosions. If you have a [[Smite of Merain]] with Firefly, that can also be fun - you can take out up to three Thrall with a single trigger pull, and then the rest of the pack with the explosions. A big shout out goes to [[Necrochasm]] and its baby brother [[Eidolon Ally]] (Thrall Edition) - Necrochasm triggers explosions on every single kill, whilst Eidolon Ally can give you a chance for bonus [[Agility]] upon a Thrall kill, kinda handy when [[Weight of Darkness]] is a consideration. If you're worried about speed, you can equip [[MIDA Multi-Tool]] for a handy boost, or a WotM Primary for the +Agility from [[Whirlwind]]. [[Zhalo Supercell]] is very handy for the chain lightning and extra super energy (as is [[Bad Juju]], for the lack of reloads and extra super energy). | ||
| + | *Avoid: nothing, really. Anything goes. You might struggle with slow-firing archetypes with long-ass reload times (such as Ill Will, etc). | ||
| + | |||
| + | '''Special''': this comes down to role/preference. A full-auto shotgun might be really handy for yellowbar [[Knight]]s and panic Thrall cleanup once your primary runs dry (and - shock horror - a fast charging fusion rifle might fill the the same role). Alternatively, [[Ogre]]s have a nasty habit of instagibbing you from across the map, so if you're confident with your Primary and Heavy to keep you going vs other mobs, a [[Sniper]] might be a good option to load in with - the higher the impact the better. [[Icebreaker]] is a fun option as body kills cause explosions (although it doesn't seem as effective as Y1). Heck, even Sidearms would work here - pretty handy against lines of Thrall, and they reload and handle exceptionally well. | ||
| + | *Avoid: trying to snipe Ogres with Shotguns and trying to blast Thrall with Snipers. Unless your Sniper is Icebreaker. | ||
| + | |||
| + | '''Heavy''': Your heavy should be something that allows you a moment of respite - something that will either clear a whole bunch of enemies at once without killing you, or something that allows pin-point targeting of yellowbar Knights. Personally, I run [[Razelighter]] as it allows me to really mess up the wee conga line of yellowbar Knights that run towards you at the end. Machine guns will give you a third option should your Primary and Special run dry against other mobs. | ||
| + | *Avoid: [[Rocket Launchers]]. This encounter is all about running, and confusing masses of enemies that come at you from all directions. There will be plenty of panic bubbles at the end should you be running with one or two Defender Titans. You will blow yourself up. | ||
| + | |||
| + | ===The Bridge Loadout=== | ||
| + | '''Primary''': this encounter can be a confusing mix of long range engagements and close-range scraps. Choose wisely based on your position in the sword queue, and your left/middle/right position on either home or away sides of the bridge. If you're the first person across the bridge, it is helpful to note that only two classes of weapon will one-shot Acolytes - [[Hand Cannons]] and [[Pulse Rifles]]. High [[Impact]] Scouts sadly don't quite hit the mark, even with Explosive Rounds active. I say this because a trio of Acolytes will spawn with a yellowbar Knight, and you'll be all on your lonesome against them - having a weapon that can snapshot the Acolytes as you run for cover, without having to worry about leaving them alive after you're shot them, is quite valuable indeed. Fatebringer is an excellent choice (and Explosive Rounds really helps with staggering crowds and distance shots). Otherwise, in other positions you might opt for a Mid-High Impact Scout (think Vision of Confluence) with a good Range stat - the shots-to-kill will be identical to their heavier brothers on everything except Knights and they fire faster, so it's a no-brainer. The [[Range]] stat is so that Guardians can snipe across back at the Home side after three make it across without sacrificing their Shotgun - especially the right-hand Away plate holder, who doesn't actually have to worry about any enemies. | ||
| + | *Avoid: nothing really, just be aware of your positioning. Facing Acolytes at close range with a Boomer bearing down on you? Might not be a great idea to have your Distant Star out. Stuck on right Away plate with nothing to do? Help your Home brothers out with Scout fire from across the way. | ||
| + | |||
| + | '''Special''': I prefer to run a [[Shotgun]] for this encounter, for a few reasons. First is the Swordbearer - I tend to be first or second across the bridge in my runs, and I quite like to save my [[Sword]] ammo for the yellowbar Knights across the way. Running a fast, full-auto Shotgun (or [[Swordbreaker]]) is a great way to quickly take down any chunky mob. Personally I use a solar [[Comedian]] with [[Full Auto]], [[Rifled Barrel]] and [[Final Round]], which wrecks shop. You might consider Found Verdict or the new IB Shotgun to be just as useful. If you have it, Swordbreaker is goddamn fantastic as it reloads blindingly fast and packs a punch against Hive Majors - it's not Full Auto though, which is a huge shame and the only reason I personally tend to avoid it in favour of my Comedian. If you find yourself devoid of any short range encounters by way of positioning and place in the queue, there's no harm in switching to a Sniper and laying down some long-range suppressive fire, although everyone save the last Guardian in the queue is going to have to face the Swordbearer at some point. Left-hand Away is going to have to face a yellowbar Wizard, so something slightly longer range with solar elemental damage is fantastic - perhaps, dare I say, a Fusion Rifle. . .? | ||
| + | *Avoid: Sidearms. They just don't lay down the hurt enough on yellowbar Knights to justify using instead of a Shotgun. Feel free to use them I guess if you're running a Sword as your Heavy, and see some value in cleaning Thrall and Acolytes up without using your Primary. | ||
| + | |||
| + | '''Heavy''': Anything that helps take mobs down from a distance, or saves you from death up close. Personally I use Razelighter as it's an invaluable tool on the Away side in the early queue. It's also more reliable at killing the Knights that spawn after 5 Gatekeepers are killed than the other Swords that spawn, so I use that up until the Gatekeepers appear. You might consider using [[Gjallarhorn]] for general duty or yellowbar kills (2 rockets per yellowbar though, very inefficient). Machine guns are great general duty weapons, and [[Song of Ir Yut]] actually wrecks [[Hive]] [[Major]]s, so there is that. | ||
| + | *Avoid: uhhhhh nothing really. It's all fair game. I might suggest that Rockets will get you killed at awkward moments and run out of ammo way too fast. | ||
| + | |||
| + | ===The Thrallway Loadout=== | ||
| + | my only tip here is that [[Gjallarhorn]] and [[Sleeper Simulant]] will one-shot the [[Shrieker]]s (Gjally is better for fire-and-forget running), so do a fast swap after Bridge ends and hopefully you'll have one or two rockets in your inventory after the swap. This wrecks your ammo inventory for Ir Yut when it's suggested that you switch to a sword, so uh, keep a synth handy? | ||
| + | |||
| + | ===Ir Yut Loadout=== | ||
| + | '''Primary''': honestly you won't be using it much. Something that can reliably take down the Shriekers should you be out of other ranged options - [[Fatebringer]] with [[Explosive Rounds]] selected comes to mind - is more or less all you need. Very occasionally you might be stuck with no heavy or special ammo with a shredder Knight firing at you from the tower, so it might pay to have something longer range available. | ||
| + | *Avoid: exotics that lock you out of better Special and Heavy choices. | ||
| + | |||
| + | '''Special''': I use my solar full-auto Comedian to take down the [[Wizard]] on left side, and mop up any mobs that my Sword hasn't taken down already. You might have positive experiences with [[Fusion Rifles]], but I've never used them or seen them used, because Shotguns are so damn effective. A good Shotgun can also really help against Ir Yut if she's not already dead from a single Nighthawk goldie. Not so much a consideration if you're doing Challenge Mode. If you don't have an exotic sword, this is a great place to bust out Fourth Horseman or Invective. | ||
| + | *Avoid: Sidearms. Should be pretty obvious why. | ||
| + | |||
| + | '''Heavy''': your first choice should be [[Razelighter]], with [[Darkdrinker]] a close second, and then in the absence of either you should equip something longer-range to help you team out from a safe distance - Gjally is a great backup that can provide AoE fire from Guardians hanging back, and is actually superb against Wizards and Shriekers. The rationale is that, on [[Challenge Mode]], you need to kill a LOT of yellow bar mobs in a reasonably short period of time. Whilst there are safer ways of approaching the situation, the absolute fastest involves you demolishing everything in sight with a team of six Razelighters. | ||
| + | *Avoid: using [[Machine Guns]] when you have better Sword/Rocket options open to you. | ||
| + | |||
| + | ===Crota Loadout=== | ||
| + | '''Primary''': as before on the Bridge notes, you'll want something that can one-shot [[Acolyte]]s, especially when the glass walls come down and you're under fire from two directions at once (unless you're actually thinking about it and position yourself at the front glass, or on top of the doorframes). Being able to snap-shot one-shot Acolytes is a really valuable ability in this case. The yellowbar Knights are hardly a threat unless they suddenly feel EXTREMELY BOLD, so you can just use whatever to whittle them down for your [[Sunsinger]] to generate orbs from. Other enemies in this encounter may include Thrall, which you know how to deal with, and yellowbar Ogres, which you're hopefully not using your Primary on - if you find yourself frequently stuck on Ogres with no Heavy left (or saving your Heavy for Crota), then I imagine something like [[Cocytus]] or [[Last Extremity]] with [[Triple Tap]] is a great choice. [[Chaos Dogma]] if you have it! Be aware that you'll be killing Acolytes very slowly with any of these locked in. | ||
| + | *Avoid: [[No Land Beyond]]. | ||
| + | |||
| + | '''Special''': I'm in two minds here. A fantastic option is a good Sniper Rifle for taking down the [[Oversoul]] - anything with [[Spray and Play]] and the raid chestpiece will reload faster than you can blink. [[Ex Machina]] is an obvious choice, as it and others in its archetype can one-shot the boomer Knights that spawn in the towers (if even touching the boomers is a thing you do). On the flipside, if you have a reliable Nighthawk to take down the Oversoul then there's really no point in having a Sniper equipped unless you struggle with boomers (or for the semi-rare occasion that your Nighthawk's super isn't back up in time). I like to keep a Shotgun equipped, as I'm a reliable sword runner that likes to have a backup to help me take down the Swordbearer in the middle, and to use it against the Ogres if for some reason we fuck up the 2-phase Crota kill. | ||
| + | *Avoid: anything else. I've heard great things about Fusion Rifles against the Oversoul, because of shenanigans to do with damage drop off. I've never seen it in action though, so hesitate to recommend it based on the other benefits of Shotguns and Snipers. | ||
| + | |||
| + | '''Heavy''': Gjallarhorn. You have no excuse not to have completed the quest to acquire it. Your exotic slot is not needed elsewhere. Unequip your NLB and throw it in the vault. A team of Gjallys is hands-down the most reliable way to down Crota's shields due to the mix of Tracking and Wolfpack Rounds. Truth used to be a decent alternative, but now it has a mag size of 1 - more risk involved there than Gjally's 2. Other rockets with Tracking, like Hunger of Crota, will do in a pinch, but personally I have found them less reliable (and Hunger has a dismal inventory stat). | ||
| + | *Avoid: Sleeper Simulant, unless you're all using it. Sleeper shots land well before the rockets hit, and it introduces complexity to an otherwise predictable instance - sword runner calls for rockets, and they know they have a second before it actually happens. Sleeper will just throw everyone off. There's an arguable benefit for Sleeper against the Oversoul, but really that shouldn't be a problem (Gjally rockets won't help much against the Oversoul and yet we all survive weekly without using them against it). | ||
==Strategy Guide== | ==Strategy Guide== | ||
| + | ===The Abyss=== | ||
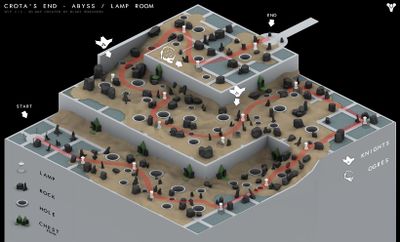
| + | [[File:crotas end abyss map2.jpg|400px|right]] | ||
| + | *Turn your Brightness up (This can help with holes which lead to the Deep South) | ||
| + | *Bring 'Crowd Controling' weapons (Things with [[Firefly]] / Lots of bullets) | ||
| + | *Use your [[Super]], don't be shy when there's like 20 [[Thrall]] chasing you. | ||
| + | *[[Tether]]s for slowing down chasing Thrall with [[Light of the Pack]] to share with your team - [[Ward of Dawn]] paired with [[Helm of Saint-14]] to blind the packs chasing / protect the team - [[Stormtrance]] to tear through waves of Thrall - Crowd management is Key | ||
| + | *When the Lamps turn orange - RUN to the next one | ||
| + | *Stay as a group and try and move together | ||
| + | |||
| + | ===Bridges=== | ||
| + | *This encounter has changed with the update. Have fun, be patient and willing to learn | ||
| + | *Powerful & close range weapons can be key here | ||
| + | |||
| + | ===Ir Yut, the Deathsinger=== | ||
| + | *She is a witch (Of Cuba) that sits in the middle Crystal room but again, this now has a challenge mode linked to it so be patient and willing to learn as the encounter may have changed. [[Rocket Launchers|Rockets]], [[Sleeper Simulant]], Decent [[Sniper Rifle|Sniper]] or [[Exotic]] [[Sword]] served well previously | ||
| + | *Previously, she 'Sang' starting off a 30 second timer. If this ran out, you wiped. Stay on your toes and don't let that set off any panic | ||
| + | |||
| + | ===Crota=== | ||
| + | *At this point, there is NO health regeneration. Certain armor and weapons can help with this details below | ||
| + | *[[Gjallarhorn]] / Sleeper Simulant - Decent Sniper for Knights / Wizards | ||
| + | *[[Bladedancer]]s are usually the 'GO TO' Swordbearer as they have abilities to go invisible. The old trick was to grab sword, crouch to go invis, team rockets Crota (Crota kneels), Sword him then DROP the sword and melee crota to go back invisible (Using Bladedancer Perk - [[Escape Artist]]), Rockets come back after his Shield goes and 2nd damage phase before running to safety - Don't be shocked if people ASK for Bladedancers to run sword | ||
| + | *As you are new I'd expect you won't be the Sword bearer (But please try it, it's awesome) | ||
| + | *Helmets / Weapons with healing perks can be a big advantage here. Helmet perk to look out for is 'Infusion' - Replenishes health each time you pick up an Orb or 'Better Already' - Shields Regen when picking up an Orb. Weapons that can do this - [[Red Death]], [[Suros Regime]] | ||
| + | *Consider using Supers in the 'Crystal Room' before Crota. Creating Orbs here and matching with Regen perks with picking up Orbs can save lives | ||
| + | *Again, Challenge mode linked could change how this plays out | ||
| + | |||
==Maps== | ==Maps== | ||
Latest revision as of 04:12, 25 April 2017
| Crota's End (Age of Triumph) | |
|---|---|
| |
| Information | |
| Type | Raid |
| Location | Moon |
| Players | 6 |
| Tier 1 Level | 390 |
| Description | He waits in the dark below. |
Lore
My name is Eriana-3, disciple of the Praxic Warlocks, marked by the Cormorant Seal. Survivor of the great disaster: the day we set out to retake our moon, united in a host of thousands, and found ourselves outmatched by one Hive champion of unspeakable power... - Eriana-3
Introduction
Crota's End (Age of Triumph) is the Light Level 390 version of Crota's End released in Age of Triumph.
Challenge Modes
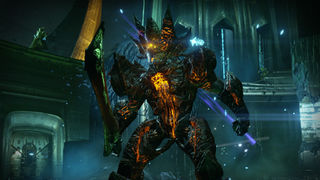
To fulfill the requirements for this Challenge, the players must slay Ir-Yut with the sword of a Swordbearer. To force a Swordbearer to spawn, every enemy in the encounter must be defeated in a timely manner. The first wave of enemies is comprised of Knights and Acolytes in the center of the arena and on either wing of the platform of that encircles the area. This wave also includes Knights in each of the towers; slaying them will cause a Wizard to appear on both sides of the interior hallway. Once the Wizards have been dealt with, two Shriekers spawn on either side of Ir-Yut's chamber; once they have been destroyed, the barrier surrounding the chamber will fall and the two Knights that appear inside must be killed.
Do not touch Ir-Yut at this point.
Once the Knights have been slain, another wave of enemies will spawn outside; this wave will be comprised of three Ogres, three Knights in each of the towers, and numerous acolytes. Once all enemies have been slain, the Swordbearer will spawn from the center door in the outside arena. It must be killed, its sword taken, and Ir-Yut slain. Note that this must be done with the sword. A single heavy smash (R2/RT) will kill her regardless of her remaining health.
This entire encounter has a time limit of roughly two minutes and fifteen seconds (2:15). If Ir-Yut is not killed within this amount of time, she will wipe the fireteam.
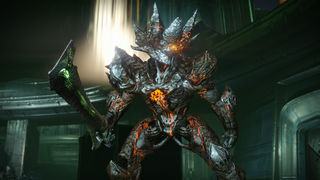
To fulfill the requirements for this Challenge, the players must slay Crota without the same player having touched the sword more than once. This is the only requirement. Note that this also applies to dropping the sword, meaning that if a player drops the sword before it disappears and then picks it back up, the Challenge attempt will fail. The easiest way to complete this challenge involves no more than three swordbearers and should generally proceed as follows:
- Player A takes the sword.
- Crota kneels. Player A hits Crota (R2/RT) three times and backs away.
- Crota summons Oversoul 1. It is ignored.
- Crota is immediately forced to kneel again.
- Player A hits Crota three more times.
- Oversoul 1 is destroyed by the rest of the fireteam.
- Crota summons Oversoul 2.
- The entire fireteam destroys Oversoul 2.
- Adds phase/restock ammo.
- Player B takes the sword.
This process repeats until Player C picks up the sword, by which point Crota should be close to dead. Note that Crota will Enrage after Player C's first three attacks with sword; however, this will not affect anything and simply means that he must immediately be forced to kneel once more and then killed.
Enjoy your loot.
Loot Table
- See also: #Loot
The Abyss
| Class Items | Quantity | Level Cap | Class | Challenge Mode | Unique Perk | Ornament | |
|---|---|---|---|---|---|---|---|
| |
Mark of the Pit (Year 3) Class Item |
0 - 1 | 400 | Titan | No | None | Yes |
| |
Bone Circlet (Year 3) Class Item |
0 - 1 | 400 | Warlock | No | None | Yes |
| |
Shroud of Flies (Year 3) Class Item |
0 - 1 | 400 | Hunter | No | None | Yes |
| Artifacts | |||||||
| |
Oversoul's Pang Artifact |
0 - 1 | 400 | Titan | No | None | N/A |
| |
Oversoul's Gasp Artifact |
0 - 1 | 400 | Warlock | No | None | N/A |
| |
Oversoul's Scream Artifact |
0 - 1 | 400 | Hunter | No | None | N/A |
| Inventory | |||||||
| |
Knuckles of Eao Consumable |
0 - 1 | N/A | N/A | No | N/A | N/A |
| |
Legendary Engram Random |
1 | N/A | N/A | No | N/A | N/A |
The Bridge
| Weapons | Quantity | Level Cap | Class | Challenge Mode | Unique Perk | Ornament | |
|---|---|---|---|---|---|---|---|
| |
Swordbreaker (Year 3) Shotgun |
0 - 1 | 400 | N/A | No | Hive Disruptor | No |
| |
Light of the Abyss (Year 3) Fusion Rifle |
0 - 1 | 400 | N/A | No | Hive Disruptor | No |
| |
Hunger of Crota (Year 3) Rocket Launcher |
0 - 1 | 400 | N/A | No | Hive Disruptor | No |
| Armor | |||||||
| |
Willbreaker's Fists (Year 3) Gauntlets |
0 - 1 | 400 | Titan | No | Glutton Hive Breaker Hive Striker Hive Destroyer |
Yes |
| |
Deathsinger's Grip (Year 3) Gauntlets |
0 - 1 | 400 | Warlock | No | Glutton Hive Breaker Hive Striker Hive Destroyer |
Yes |
| |
Dogged Gage (Year 3) Gauntlets |
0 - 1 | 400 | Hunter | No | Glutton Hive Breaker Hive Striker Hive Destroyer |
Yes |
Ir Yut, the Deathsinger
Crota
| Weapons (One to two of the following) | Quantity | Level Cap | Class | Challenge Mode | Unique Perk | Ornament | |
|---|---|---|---|---|---|---|---|
| |
Abyss Defiant (Adept) Auto Rifle |
1 | 400 | N/A | Yes | Solar Damage Lich Bane Hive Disruptor |
No |
| |
Oversoul Edict (Adept) Pulse Rifle |
1 | 400 | N/A | Yes | Arc Damage Dark Breaker Hive Disruptor |
No |
| |
Word of Crota (Adept) Hand Cannon |
1 | 400 | N/A | Yes | Void Damage Phantom Gift Hive Disruptor |
No |
| |
Fang of Ir Yut (Adept) Scout Rifle |
1 | 400 | N/A | Yes | Arc Damage Target Mark Hive Disruptor |
No |
| Weapons | |||||||
| |
Abyss Defiant (Year 3) Auto Rifle |
0 - 1 | 400 | N/A | No | Lich Bane Hive Disruptor |
No |
| |
Oversoul Edict (Year 3) Pulse Rifle |
0 - 1 | 400 | N/A | No | Dark Breaker Hive Disruptor |
No |
| |
Word of Crota (Year 3) Hand Cannon |
0 - 1 | 400 | N/A | No | Phantom Gift Hive Disruptor |
No |
| |
Fang of Ir Yut (Year 3) Scout Rifle |
0 - 1 | 400 | N/A | No | Target Mark Hive Disruptor |
No |
| |
Song of Ir Yut (Year 3) Machine Gun |
0 - 1 | 400 | N/A | No | Dark Breaker Hive Disruptor |
No |
| Armor | |||||||
| |
Willbreaker's Watch (Year 3) Helmet |
0 - 1 | 400 | Titan | No | Moment of Power Shine On |
Yes |
| |
Deathsinger's Gaze (Year 3) Helmet |
0 - 1 | 400 | Warlock | No | Moment of Power Shine On |
Yes |
| |
Unyielding Casque (Year 3) Helmet |
0 - 1 | 400 | Hunter | No | Moment of Power Shine On |
Yes |
| Inventory | |||||||
| |
Age of Triumph Ornament Ornament |
1 | N/A | N/A | Yes | N/A | N/A |
| |
Soul Extracted Emblem |
1 | N/A | N/A | Yes | N/A | N/A |
| |
Dance of Bones Shader |
0 - 1 | N/A | N/A | No | N/A | N/A |
| |
Glowhoo Shader |
0 - 1 | N/A | N/A | No | N/A | N/A |
| |
Bane of Dark Gods Ship |
0 - 1 | N/A | N/A | No | N/A | N/A |
| |
S-13 Graverobber Sparrow |
0 - 1 | N/A | N/A | No | N/A | N/A |
| |
Ascendant Shell Ghost Shell |
0 - 1 | 400 | N/A | No | None | No |
Chests
| Weapons | Quantity | Level Cap | Class | Challenge Mode | Unique Perk | Ornament | |
|---|---|---|---|---|---|---|---|
| |
Random Exotic Weapon Random |
0 - 1 | 400 | N/A | No | N/A | N/A |
| Class Items | |||||||
| |
Mark of the Pit (Year 3) Class Item |
0 - 1 | 400 | Titan | No | None | Yes |
| |
Bone Circlet (Year 3) Class Item |
0 - 1 | 400 | Warlock | No | None | Yes |
| |
Shroud of Flies (Year 3) Class Item |
0 - 1 | 400 | Hunter | No | None | Yes |
| Inventory | |||||||
| |
Legendary Engram Random |
0 - 1 | N/A | N/A | No | N/A | N/A |
| |
Armor Materials Materials |
0 - 10 | N/A | N/A | No | N/A | N/A |

|
Weapon Parts Materials |
0 - 10 | N/A | N/A | No | N/A | N/A |
Loot
- See also: #Loot Table
Weapons
Exotic Weapons
| Weapon | Type | Damage Type | Attack | Impact | Rate of Fire | Range | Stability | Reload | Magazine |
|---|---|---|---|---|---|---|---|---|---|
| Abyss Defiant (Adept) | Auto Rifles | Solar | 400 | 8 | 88 | 25 | 44 | 85 | 31 |
| Necrochasm (Year 3) | Auto Rifles | Arc | 400 | 2 | 100 | 19 | 55 | 76 | 54 |
| Word of Crota (Adept) | Hand Cannons | Void | 320–400 | 68 | 32 | 25–37 | 45–51 | 45–60 | 12 |
| Oversoul Edict (Adept) | Pulse Rifles | Arc | 320–400 | 4 | 77 | 33–37 | 54–71 | 61–64 | 30 |
| Fang of Ir Yut (Adept) | Scout Rifles | Arc | 320–400 | 48 | 37 | 75-83 | 49–74 | 67-73 | 15 |
Legendary Weapons
| Weapon | Type | Damage Type | Attack | Impact | Rate of Fire | Range | Stability | Reload | Magazine |
|---|---|---|---|---|---|---|---|---|---|
| Abyss Defiant (Year 3) | Auto Rifles | Kinetic | 365–400 | 8 | 88 | 25–29 | 44–75 | 85–96 | 31 |
| Light of the Abyss (Year 3) | Fusion Rifles | Arc | 365–400 | 68 | 32–38 | 41–46 | 61–78 | 7–8 | |
| Word of Crota (Year 3) | Hand Cannons | Kinetic | 365–400 | 68 | 32 | 25–37 | 45–51 | 45–60 | 12 |
| Song of Ir Yut (Year 3) | Machine Guns | Arc | 365–400 | 25-29 | 100 | 10-28 | 11-42 | 48-61 | 87 |
| Oversoul Edict (Year 3) | Pulse Rifles | Kinetic | 365–400 | 4 | 77 | 33–37 | 54–71 | 61–64 | 30 |
| Hunger of Crota (Year 3) | Rocket Launchers | Solar | 365–400 | 11 | 53–62 | 71 | 2 | ||
| Fang of Ir Yut (Year 3) | Scout Rifles | Kinetic | 365–400 | 48 | 37 | 75-83 | 49–74 | 67-73 | 15 |
| Swordbreaker (Year 3) | Shotguns | Void | 365–400 | 40–42 | 35 | 9–18 | 23–34 | 53–67 | 6 |
Armor
Titan Armor
| Type | Defense | Discipline | Intellect | Strength | |
|---|---|---|---|---|---|
| Mark of the Pit (Year 3) | Titan Marks | 365 - 400 | 21 - 35 | 21 - 35 | 21 - 35 |
| Willbreaker's Fists (Year 3) | Gauntlets | 365–400 | 34–58 | 34–58 | 34–58 |
| Willbreaker's Greaves (Year 3) | Leg Armor | 365–400 | 47–79 | 47–79 | 47–79 |
| Willbreaker's Resolve (Year 3) | Chest Armor | 365–400 | 51–86 | 51–86 | 51–86 |
| Willbreaker's Watch (Year 3) | Helmets | 365–400 | 38–65 | 38–65 | 38–65 |
Hunter Armor
| Type | Defense | Discipline | Intellect | Strength | |
|---|---|---|---|---|---|
| Dogged Gage (Year 3) | Gauntlets | 365–400 | 34–58 | 34–58 | 34–58 |
| Relentless Harness (Year 3) | Chest Armor | 365–400 | 51–86 | 51–86 | 51–86 |
| Shroud of Flies (Year 3) | Hunter Cloaks | 365 - 400 | 21 - 35 | 21 - 35 | 21 - 35 |
| Tireless Striders (Year 3) | Leg Armor | 365–400 | 47–79 | 47–79 | 47–79 |
| Unyielding Casque (Year 3) | Helmets | 365–400 | 38–65 | 38–65 | 38–65 |
Warlock Armor
| Type | Defense | Discipline | Intellect | Strength | |
|---|---|---|---|---|---|
| Bone Circlet (Year 3) | Warlock Bonds | 365 - 400 | 21 - 35 | 21 - 35 | 21 - 35 |
| Deathsinger's Gaze (Year 3) | Helmets | 365–400 | 38–65 | 38–65 | 38–65 |
| Deathsinger's Grip (Year 3) | Gauntlets | 365–400 | 34–58 | 34–58 | 34–58 |
| Deathsinger's Herald (Year 3) | Leg Armor | 365–400 | 47–79 | 47–79 | 47–79 |
| Deathsinger's Mantle (Year 3) | Chest Armor | 365–400 | 51–86 | 51–86 | 51–86 |
Other Items
- Oversoul's Pang - Titan Artifact
- Oversoul's Scream - Hunter Artifact
- Oversoul's Gasp - Warlock Artifact
Weapon Loadout
The Abyss Loadout
Primary: your main adversary for the majority of this section (for the purposes of your Primary Weapon, anyway) will be Thrall. Lots and lots of Thrall. Anything you own that has Firefly, Explosive Rounds or both - hello, Fatebringer - will decimate the Abyss' native Thrall population with ease. Personally I'm a fan of Genesis Chain, as it can mow through legions of the buggars with ease and makes lots of pretty, though less impactful, Firefly explosions. If you have a Smite of Merain with Firefly, that can also be fun - you can take out up to three Thrall with a single trigger pull, and then the rest of the pack with the explosions. A big shout out goes to Necrochasm and its baby brother Eidolon Ally (Thrall Edition) - Necrochasm triggers explosions on every single kill, whilst Eidolon Ally can give you a chance for bonus Agility upon a Thrall kill, kinda handy when Weight of Darkness is a consideration. If you're worried about speed, you can equip MIDA Multi-Tool for a handy boost, or a WotM Primary for the +Agility from Whirlwind. Zhalo Supercell is very handy for the chain lightning and extra super energy (as is Bad Juju, for the lack of reloads and extra super energy).
- Avoid: nothing, really. Anything goes. You might struggle with slow-firing archetypes with long-ass reload times (such as Ill Will, etc).
Special: this comes down to role/preference. A full-auto shotgun might be really handy for yellowbar Knights and panic Thrall cleanup once your primary runs dry (and - shock horror - a fast charging fusion rifle might fill the the same role). Alternatively, Ogres have a nasty habit of instagibbing you from across the map, so if you're confident with your Primary and Heavy to keep you going vs other mobs, a Sniper might be a good option to load in with - the higher the impact the better. Icebreaker is a fun option as body kills cause explosions (although it doesn't seem as effective as Y1). Heck, even Sidearms would work here - pretty handy against lines of Thrall, and they reload and handle exceptionally well.
- Avoid: trying to snipe Ogres with Shotguns and trying to blast Thrall with Snipers. Unless your Sniper is Icebreaker.
Heavy: Your heavy should be something that allows you a moment of respite - something that will either clear a whole bunch of enemies at once without killing you, or something that allows pin-point targeting of yellowbar Knights. Personally, I run Razelighter as it allows me to really mess up the wee conga line of yellowbar Knights that run towards you at the end. Machine guns will give you a third option should your Primary and Special run dry against other mobs.
- Avoid: Rocket Launchers. This encounter is all about running, and confusing masses of enemies that come at you from all directions. There will be plenty of panic bubbles at the end should you be running with one or two Defender Titans. You will blow yourself up.
The Bridge Loadout
Primary: this encounter can be a confusing mix of long range engagements and close-range scraps. Choose wisely based on your position in the sword queue, and your left/middle/right position on either home or away sides of the bridge. If you're the first person across the bridge, it is helpful to note that only two classes of weapon will one-shot Acolytes - Hand Cannons and Pulse Rifles. High Impact Scouts sadly don't quite hit the mark, even with Explosive Rounds active. I say this because a trio of Acolytes will spawn with a yellowbar Knight, and you'll be all on your lonesome against them - having a weapon that can snapshot the Acolytes as you run for cover, without having to worry about leaving them alive after you're shot them, is quite valuable indeed. Fatebringer is an excellent choice (and Explosive Rounds really helps with staggering crowds and distance shots). Otherwise, in other positions you might opt for a Mid-High Impact Scout (think Vision of Confluence) with a good Range stat - the shots-to-kill will be identical to their heavier brothers on everything except Knights and they fire faster, so it's a no-brainer. The Range stat is so that Guardians can snipe across back at the Home side after three make it across without sacrificing their Shotgun - especially the right-hand Away plate holder, who doesn't actually have to worry about any enemies.
- Avoid: nothing really, just be aware of your positioning. Facing Acolytes at close range with a Boomer bearing down on you? Might not be a great idea to have your Distant Star out. Stuck on right Away plate with nothing to do? Help your Home brothers out with Scout fire from across the way.
Special: I prefer to run a Shotgun for this encounter, for a few reasons. First is the Swordbearer - I tend to be first or second across the bridge in my runs, and I quite like to save my Sword ammo for the yellowbar Knights across the way. Running a fast, full-auto Shotgun (or Swordbreaker) is a great way to quickly take down any chunky mob. Personally I use a solar Comedian with Full Auto, Rifled Barrel and Final Round, which wrecks shop. You might consider Found Verdict or the new IB Shotgun to be just as useful. If you have it, Swordbreaker is goddamn fantastic as it reloads blindingly fast and packs a punch against Hive Majors - it's not Full Auto though, which is a huge shame and the only reason I personally tend to avoid it in favour of my Comedian. If you find yourself devoid of any short range encounters by way of positioning and place in the queue, there's no harm in switching to a Sniper and laying down some long-range suppressive fire, although everyone save the last Guardian in the queue is going to have to face the Swordbearer at some point. Left-hand Away is going to have to face a yellowbar Wizard, so something slightly longer range with solar elemental damage is fantastic - perhaps, dare I say, a Fusion Rifle. . .?
- Avoid: Sidearms. They just don't lay down the hurt enough on yellowbar Knights to justify using instead of a Shotgun. Feel free to use them I guess if you're running a Sword as your Heavy, and see some value in cleaning Thrall and Acolytes up without using your Primary.
Heavy: Anything that helps take mobs down from a distance, or saves you from death up close. Personally I use Razelighter as it's an invaluable tool on the Away side in the early queue. It's also more reliable at killing the Knights that spawn after 5 Gatekeepers are killed than the other Swords that spawn, so I use that up until the Gatekeepers appear. You might consider using Gjallarhorn for general duty or yellowbar kills (2 rockets per yellowbar though, very inefficient). Machine guns are great general duty weapons, and Song of Ir Yut actually wrecks Hive Majors, so there is that.
- Avoid: uhhhhh nothing really. It's all fair game. I might suggest that Rockets will get you killed at awkward moments and run out of ammo way too fast.
The Thrallway Loadout
my only tip here is that Gjallarhorn and Sleeper Simulant will one-shot the Shriekers (Gjally is better for fire-and-forget running), so do a fast swap after Bridge ends and hopefully you'll have one or two rockets in your inventory after the swap. This wrecks your ammo inventory for Ir Yut when it's suggested that you switch to a sword, so uh, keep a synth handy?
Ir Yut Loadout
Primary: honestly you won't be using it much. Something that can reliably take down the Shriekers should you be out of other ranged options - Fatebringer with Explosive Rounds selected comes to mind - is more or less all you need. Very occasionally you might be stuck with no heavy or special ammo with a shredder Knight firing at you from the tower, so it might pay to have something longer range available.
- Avoid: exotics that lock you out of better Special and Heavy choices.
Special: I use my solar full-auto Comedian to take down the Wizard on left side, and mop up any mobs that my Sword hasn't taken down already. You might have positive experiences with Fusion Rifles, but I've never used them or seen them used, because Shotguns are so damn effective. A good Shotgun can also really help against Ir Yut if she's not already dead from a single Nighthawk goldie. Not so much a consideration if you're doing Challenge Mode. If you don't have an exotic sword, this is a great place to bust out Fourth Horseman or Invective.
- Avoid: Sidearms. Should be pretty obvious why.
Heavy: your first choice should be Razelighter, with Darkdrinker a close second, and then in the absence of either you should equip something longer-range to help you team out from a safe distance - Gjally is a great backup that can provide AoE fire from Guardians hanging back, and is actually superb against Wizards and Shriekers. The rationale is that, on Challenge Mode, you need to kill a LOT of yellow bar mobs in a reasonably short period of time. Whilst there are safer ways of approaching the situation, the absolute fastest involves you demolishing everything in sight with a team of six Razelighters.
- Avoid: using Machine Guns when you have better Sword/Rocket options open to you.
Crota Loadout
Primary: as before on the Bridge notes, you'll want something that can one-shot Acolytes, especially when the glass walls come down and you're under fire from two directions at once (unless you're actually thinking about it and position yourself at the front glass, or on top of the doorframes). Being able to snap-shot one-shot Acolytes is a really valuable ability in this case. The yellowbar Knights are hardly a threat unless they suddenly feel EXTREMELY BOLD, so you can just use whatever to whittle them down for your Sunsinger to generate orbs from. Other enemies in this encounter may include Thrall, which you know how to deal with, and yellowbar Ogres, which you're hopefully not using your Primary on - if you find yourself frequently stuck on Ogres with no Heavy left (or saving your Heavy for Crota), then I imagine something like Cocytus or Last Extremity with Triple Tap is a great choice. Chaos Dogma if you have it! Be aware that you'll be killing Acolytes very slowly with any of these locked in.
- Avoid: No Land Beyond.
Special: I'm in two minds here. A fantastic option is a good Sniper Rifle for taking down the Oversoul - anything with Spray and Play and the raid chestpiece will reload faster than you can blink. Ex Machina is an obvious choice, as it and others in its archetype can one-shot the boomer Knights that spawn in the towers (if even touching the boomers is a thing you do). On the flipside, if you have a reliable Nighthawk to take down the Oversoul then there's really no point in having a Sniper equipped unless you struggle with boomers (or for the semi-rare occasion that your Nighthawk's super isn't back up in time). I like to keep a Shotgun equipped, as I'm a reliable sword runner that likes to have a backup to help me take down the Swordbearer in the middle, and to use it against the Ogres if for some reason we fuck up the 2-phase Crota kill.
- Avoid: anything else. I've heard great things about Fusion Rifles against the Oversoul, because of shenanigans to do with damage drop off. I've never seen it in action though, so hesitate to recommend it based on the other benefits of Shotguns and Snipers.
Heavy: Gjallarhorn. You have no excuse not to have completed the quest to acquire it. Your exotic slot is not needed elsewhere. Unequip your NLB and throw it in the vault. A team of Gjallys is hands-down the most reliable way to down Crota's shields due to the mix of Tracking and Wolfpack Rounds. Truth used to be a decent alternative, but now it has a mag size of 1 - more risk involved there than Gjally's 2. Other rockets with Tracking, like Hunger of Crota, will do in a pinch, but personally I have found them less reliable (and Hunger has a dismal inventory stat).
- Avoid: Sleeper Simulant, unless you're all using it. Sleeper shots land well before the rockets hit, and it introduces complexity to an otherwise predictable instance - sword runner calls for rockets, and they know they have a second before it actually happens. Sleeper will just throw everyone off. There's an arguable benefit for Sleeper against the Oversoul, but really that shouldn't be a problem (Gjally rockets won't help much against the Oversoul and yet we all survive weekly without using them against it).
Strategy Guide
The Abyss
- Turn your Brightness up (This can help with holes which lead to the Deep South)
- Bring 'Crowd Controling' weapons (Things with Firefly / Lots of bullets)
- Use your Super, don't be shy when there's like 20 Thrall chasing you.
- Tethers for slowing down chasing Thrall with Light of the Pack to share with your team - Ward of Dawn paired with Helm of Saint-14 to blind the packs chasing / protect the team - Stormtrance to tear through waves of Thrall - Crowd management is Key
- When the Lamps turn orange - RUN to the next one
- Stay as a group and try and move together
Bridges
- This encounter has changed with the update. Have fun, be patient and willing to learn
- Powerful & close range weapons can be key here
Ir Yut, the Deathsinger
- She is a witch (Of Cuba) that sits in the middle Crystal room but again, this now has a challenge mode linked to it so be patient and willing to learn as the encounter may have changed. Rockets, Sleeper Simulant, Decent Sniper or Exotic Sword served well previously
- Previously, she 'Sang' starting off a 30 second timer. If this ran out, you wiped. Stay on your toes and don't let that set off any panic
Crota
- At this point, there is NO health regeneration. Certain armor and weapons can help with this details below
- Gjallarhorn / Sleeper Simulant - Decent Sniper for Knights / Wizards
- Bladedancers are usually the 'GO TO' Swordbearer as they have abilities to go invisible. The old trick was to grab sword, crouch to go invis, team rockets Crota (Crota kneels), Sword him then DROP the sword and melee crota to go back invisible (Using Bladedancer Perk - Escape Artist), Rockets come back after his Shield goes and 2nd damage phase before running to safety - Don't be shocked if people ASK for Bladedancers to run sword
- As you are new I'd expect you won't be the Sword bearer (But please try it, it's awesome)
- Helmets / Weapons with healing perks can be a big advantage here. Helmet perk to look out for is 'Infusion' - Replenishes health each time you pick up an Orb or 'Better Already' - Shields Regen when picking up an Orb. Weapons that can do this - Red Death, Suros Regime
- Consider using Supers in the 'Crystal Room' before Crota. Creating Orbs here and matching with Regen perks with picking up Orbs can save lives
- Again, Challenge mode linked could change how this plays out
