Difference between revisions of "Crota's End (Age of Triumph)"
(→Strategy Guide) |
|||
| Line 654: | Line 654: | ||
| style="padding:10px;"| N/A | | style="padding:10px;"| N/A | ||
|} | |} | ||
| − | |||
| − | |||
| − | |||
| − | |||
| − | |||
| − | |||
| − | |||
| − | |||
| − | |||
| − | |||
| − | |||
| − | |||
| − | |||
| − | |||
| − | |||
| − | |||
| − | |||
| − | |||
| − | |||
| − | |||
| − | |||
| − | |||
| − | |||
| − | |||
| − | |||
| − | |||
| − | |||
==Loot== | ==Loot== | ||
| Line 763: | Line 736: | ||
*[[Oversoul's Scream]] - [[Hunter Artifact]] | *[[Oversoul's Scream]] - [[Hunter Artifact]] | ||
*[[Oversoul's Gasp]] - [[Warlock Artifact]] | *[[Oversoul's Gasp]] - [[Warlock Artifact]] | ||
| + | |||
| + | ==Strategy Guide== | ||
| + | ===The Abyss=== | ||
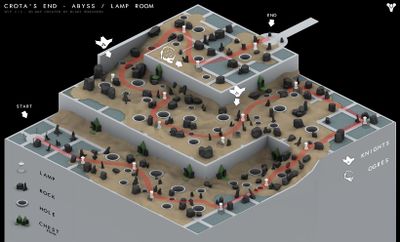
| + | [[File:crotas end abyss map2.jpg|400px|right]] | ||
| + | *Turn your Brightness up (This can help with holes which lead to the Deep South) | ||
| + | *Bring 'Crowd Controling' weapons (Things with [[Firefly]] / Lots of bullets) | ||
| + | *Use your [[Super]], don't be shy when there's like 20 [[Thrall]] chasing you. | ||
| + | *[[Tether]]s for slowing down chasing Thrall with [[Light of the Pack]] to share with your team - [[Ward of Dawn]] paired with [[Helm of Saint-14]] to blind the packs chasing / protect the team - [[Stormtrance]] to tear through waves of Thrall - Crowd management is Key | ||
| + | *When the Lamps turn orange - RUN to the next one | ||
| + | *Stay as a group and try and move together | ||
| + | |||
| + | ===Bridges=== | ||
| + | *This encounter has changed with the update. Have fun, be patient and willing to learn | ||
| + | *Powerful & close range weapons can be key here | ||
| + | |||
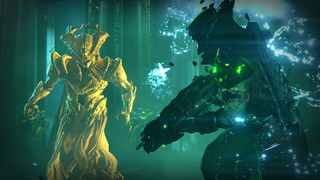
| + | ===Ir Yut, the Deathsinger=== | ||
| + | *She is a witch (Of Cuba) that sits in the middle Crystal room but again, this now has a challenge mode linked to it so be patient and willing to learn as the encounter may have changed. [[Rocket Launchers|Rockets]], [[Sleeper Simulant]], Decent [[Sniper Rifle|Sniper]] or [[Exotic]] [[Sword]] served well previously | ||
| + | *Previously, she 'Sang' starting off a 30 second timer. If this ran out, you wiped. Stay on your toes and don't let that set off any panic | ||
| + | |||
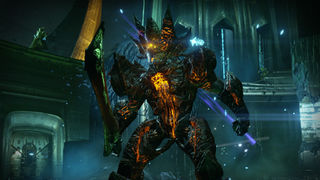
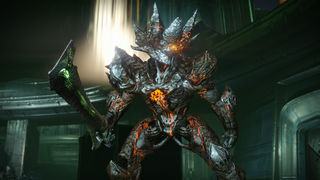
| + | ===Crota=== | ||
| + | *At this point, there is NO health regeneration. Certain armor and weapons can help with this details below | ||
| + | *[[Gjallarhorn]] / Sleeper Simulant - Decent Sniper for Knights / Wizards | ||
| + | *[[Bladedancer]]s are usually the 'GO TO' Swordbearer as they have abilities to go invisible. The old trick was to grab sword, crouch to go invis, team rockets Crota (Crota kneels), Sword him then DROP the sword and melee crota to go back invisible (Using Bladedancer Perk - [[Escape Artist]]), Rockets come back after his Shield goes and 2nd damage phase before running to safety - Don't be shocked if people ASK for Bladedancers to run sword | ||
| + | *As you are new I'd expect you won't be the Sword bearer (But please try it, it's awesome) | ||
| + | *Helmets / Weapons with healing perks can be a big advantage here. Helmet perk to look out for is 'Infusion' - Replenishes health each time you pick up an Orb or 'Better Already' - Shields Regen when picking up an Orb. Weapons that can do this - [[Red Death]], [[Suros Regime]] | ||
| + | *Consider using Supers in the 'Crystal Room' before Crota. Creating Orbs here and matching with Regen perks with picking up Orbs can save lives | ||
| + | *Again, Challenge mode linked could change how this plays out | ||
| + | |||
==Maps== | ==Maps== | ||
Revision as of 02:51, 25 April 2017
| Crota's End (Age of Triumph) | |
|---|---|
| |
| Information | |
| Type | Raid |
| Location | Moon |
| Players | 6 |
| Tier 1 Level | 390 |
| Description | He waits in the dark below. |
Lore
My name is Eriana-3, disciple of the Praxic Warlocks, marked by the Cormorant Seal. Survivor of the great disaster: the day we set out to retake our moon, united in a host of thousands, and found ourselves outmatched by one Hive champion of unspeakable power... - Eriana-3
Contents
Introduction
Crota's End (Age of Triumph) is the Light Level 390 version of Crota's End released in Age of Triumph.
Challenge Modes
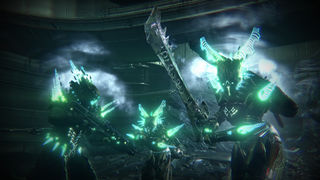
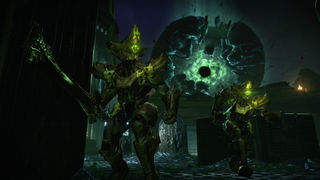
To fulfill the requirements for this Challenge, the players must slay Ir-Yut with the sword of a Swordbearer. To force a Swordbearer to spawn, every enemy in the encounter must be defeated in a timely manner. The first wave of enemies is comprised of Knights and Acolytes in the center of the arena and on either wing of the platform of that encircles the area. This wave also includes Knights in each of the towers; slaying them will cause a Wizard to appear on both sides of the interior hallway. Once the Wizards have been dealt with, two Shriekers spawn on either side of Ir-Yut's chamber; once they have been destroyed, the barrier surrounding the chamber will fall and the two Knights that appear inside must be killed.
Do not touch Ir-Yut at this point.
Once the Knights have been slain, another wave of enemies will spawn outside; this wave will be comprised of three Ogres, three Knights in each of the towers, and numerous acolytes. Once all enemies have been slain, the Swordbearer will spawn from the center door in the outside arena. It must be killed, its sword taken, and Ir-Yut slain. Note that this must be done with the sword. A single heavy smash (R2/RT) will kill her regardless of her remaining health.
This entire encounter has a time limit of roughly two minutes and fifteen seconds (2:15). If Ir-Yut is not killed within this amount of time, she will wipe the fireteam.
To fulfill the requirements for this Challenge, the players must slay Crota without the same player having touched the sword more than once. This is the only requirement. Note that this also applies to dropping the sword, meaning that if a player drops the sword before it disappears and then picks it back up, the Challenge attempt will fail. The easiest way to complete this challenge involves no more than three swordbearers and should generally proceed as follows:
- Player A takes the sword.
- Crota kneels. Player A hits Crota (R2/RT) three times and backs away.
- Crota summons Oversoul 1. It is ignored.
- Crota is immediately forced to kneel again.
- Player A hits Crota three more times.
- Oversoul 1 is destroyed by the rest of the fireteam.
- Crota summons Oversoul 2.
- The entire fireteam destroys Oversoul 2.
- Adds phase/restock ammo.
- Player B takes the sword.
This process repeats until Player C picks up the sword, by which point Crota should be close to dead. Note that Crota will Enrage after Player C's first three attacks with sword; however, this will not affect anything and simply means that he must immediately be forced to kneel once more and then killed.
Enjoy your loot.
Loot Table
- See also: #Loot
The Abyss
| Class Items | Quantity | Level Cap | Class | Challenge Mode | Unique Perk | Ornament | |
|---|---|---|---|---|---|---|---|
| |
Mark of the Pit (Year 3) Class Item |
0 - 1 | 400 | Titan | No | None | Yes |
| |
Bone Circlet (Year 3) Class Item |
0 - 1 | 400 | Warlock | No | None | Yes |
| |
Shroud of Flies (Year 3) Class Item |
0 - 1 | 400 | Hunter | No | None | Yes |
| Artifacts | |||||||
| |
Oversoul's Pang Artifact |
0 - 1 | 400 | Titan | No | None | N/A |
| |
Oversoul's Gasp Artifact |
0 - 1 | 400 | Warlock | No | None | N/A |
| |
Oversoul's Scream Artifact |
0 - 1 | 400 | Hunter | No | None | N/A |
| Inventory | |||||||
| |
Knuckles of Eao Consumable |
0 - 1 | N/A | N/A | No | N/A | N/A |
| |
Legendary Engram Random |
1 | N/A | N/A | No | N/A | N/A |
The Bridge
| Weapons | Quantity | Level Cap | Class | Challenge Mode | Unique Perk | Ornament | |
|---|---|---|---|---|---|---|---|
| |
Swordbreaker (Year 3) Shotgun |
0 - 1 | 400 | N/A | No | Hive Disruptor | No |
| |
Light of the Abyss (Year 3) Fusion Rifle |
0 - 1 | 400 | N/A | No | Hive Disruptor | No |
| |
Hunger of Crota (Year 3) Rocket Launcher |
0 - 1 | 400 | N/A | No | Hive Disruptor | No |
| Armor | |||||||
| |
Willbreaker's Fists (Year 3) Gauntlets |
0 - 1 | 400 | Titan | No | Glutton Hive Breaker Hive Striker Hive Destroyer |
Yes |
| |
Deathsinger's Grip (Year 3) Gauntlets |
0 - 1 | 400 | Warlock | No | Glutton Hive Breaker Hive Striker Hive Destroyer |
Yes |
| |
Dogged Gage (Year 3) Gauntlets |
0 - 1 | 400 | Hunter | No | Glutton Hive Breaker Hive Striker Hive Destroyer |
Yes |
Ir Yut, the Deathsinger
Crota
| Weapons (One to two of the following) | Quantity | Level Cap | Class | Challenge Mode | Unique Perk | Ornament | |
|---|---|---|---|---|---|---|---|
| |
Abyss Defiant (Adept) Auto Rifle |
1 | 400 | N/A | Yes | Solar Damage Lich Bane Hive Disruptor |
No |
| |
Oversoul Edict (Adept) Pulse Rifle |
1 | 400 | N/A | Yes | Arc Damage Dark Breaker Hive Disruptor |
No |
| |
Word of Crota (Adept) Hand Cannon |
1 | 400 | N/A | Yes | Void Damage Phantom Gift Hive Disruptor |
No |
| |
Fang of Ir Yut (Adept) Scout Rifle |
1 | 400 | N/A | Yes | Arc Damage Target Mark Hive Disruptor |
No |
| Weapons | |||||||
| |
Abyss Defiant (Year 3) Auto Rifle |
0 - 1 | 400 | N/A | No | Lich Bane Hive Disruptor |
No |
| |
Oversoul Edict (Year 3) Pulse Rifle |
0 - 1 | 400 | N/A | No | Dark Breaker Hive Disruptor |
No |
| |
Word of Crota (Year 3) Hand Cannon |
0 - 1 | 400 | N/A | No | Phantom Gift Hive Disruptor |
No |
| |
Fang of Ir Yut (Year 3) Scout Rifle |
0 - 1 | 400 | N/A | No | Target Mark Hive Disruptor |
No |
| |
Song of Ir Yut (Year 3) Machine Gun |
0 - 1 | 400 | N/A | No | Dark Breaker Hive Disruptor |
No |
| Armor | |||||||
| |
Willbreaker's Watch (Year 3) Helmet |
0 - 1 | 400 | Titan | No | Moment of Power Shine On |
Yes |
| |
Deathsinger's Gaze (Year 3) Helmet |
0 - 1 | 400 | Warlock | No | Moment of Power Shine On |
Yes |
| |
Unyielding Casque (Year 3) Helmet |
0 - 1 | 400 | Hunter | No | Moment of Power Shine On |
Yes |
| Inventory | |||||||
| |
Age of Triumph Ornament Ornament |
1 | N/A | N/A | Yes | N/A | N/A |
| |
Soul Extracted Emblem |
1 | N/A | N/A | Yes | N/A | N/A |
| |
Dance of Bones Shader |
0 - 1 | N/A | N/A | No | N/A | N/A |
| |
Glowhoo Shader |
0 - 1 | N/A | N/A | No | N/A | N/A |
| |
Bane of Dark Gods Ship |
0 - 1 | N/A | N/A | No | N/A | N/A |
| |
S-13 Graverobber Sparrow |
0 - 1 | N/A | N/A | No | N/A | N/A |
| |
Ascendant Shell Ghost Shell |
0 - 1 | 400 | N/A | No | None | No |
Chests
| Weapons | Quantity | Level Cap | Class | Challenge Mode | Unique Perk | Ornament | |
|---|---|---|---|---|---|---|---|
| |
Random Exotic Weapon Random |
0 - 1 | 400 | N/A | No | N/A | N/A |
| Class Items | |||||||
| |
Mark of the Pit (Year 3) Class Item |
0 - 1 | 400 | Titan | No | None | Yes |
| |
Bone Circlet (Year 3) Class Item |
0 - 1 | 400 | Warlock | No | None | Yes |
| |
Shroud of Flies (Year 3) Class Item |
0 - 1 | 400 | Hunter | No | None | Yes |
| Inventory | |||||||
| |
Legendary Engram Random |
0 - 1 | N/A | N/A | No | N/A | N/A |
| |
Armor Materials Materials |
0 - 10 | N/A | N/A | No | N/A | N/A |

|
Weapon Parts Materials |
0 - 10 | N/A | N/A | No | N/A | N/A |
Loot
- See also: #Loot Table
Weapons
Exotic Weapons
| Weapon | Type | Damage Type | Attack | Impact | Rate of Fire | Range | Stability | Reload | Magazine |
|---|---|---|---|---|---|---|---|---|---|
| Necrochasm (Year 3) | Auto Rifles | Arc | 400 | 2 | 100 | 19 | 55 | 76 | 54 |
| Abyss Defiant (Adept) | Auto Rifles | Solar | 400 | 8 | 88 | 25 | 44 | 85 | 31 |
| Word of Crota (Adept) | Hand Cannons | Void | 320–400 | 68 | 32 | 25–37 | 45–51 | 45–60 | 12 |
| Oversoul Edict (Adept) | Pulse Rifles | Arc | 320–400 | 4 | 77 | 33–37 | 54–71 | 61–64 | 30 |
| Fang of Ir Yut (Adept) | Scout Rifles | Arc | 320–400 | 48 | 37 | 75-83 | 49–74 | 67-73 | 15 |
Legendary Weapons
| Weapon | Type | Damage Type | Attack | Impact | Rate of Fire | Range | Stability | Reload | Magazine |
|---|---|---|---|---|---|---|---|---|---|
| Abyss Defiant (Year 3) | Auto Rifles | Kinetic | 365–400 | 8 | 88 | 25–29 | 44–75 | 85–96 | 31 |
| Light of the Abyss (Year 3) | Fusion Rifles | Arc | 365–400 | 68 | 32–38 | 41–46 | 61–78 | 7–8 | |
| Word of Crota (Year 3) | Hand Cannons | Kinetic | 365–400 | 68 | 32 | 25–37 | 45–51 | 45–60 | 12 |
| Song of Ir Yut (Year 3) | Machine Guns | Arc | 365–400 | 25-29 | 100 | 10-28 | 11-42 | 48-61 | 87 |
| Oversoul Edict (Year 3) | Pulse Rifles | Kinetic | 365–400 | 4 | 77 | 33–37 | 54–71 | 61–64 | 30 |
| Hunger of Crota (Year 3) | Rocket Launchers | Solar | 365–400 | 11 | 53–62 | 71 | 2 | ||
| Fang of Ir Yut (Year 3) | Scout Rifles | Kinetic | 365–400 | 48 | 37 | 75-83 | 49–74 | 67-73 | 15 |
| Swordbreaker (Year 3) | Shotguns | Void | 365–400 | 40–42 | 35 | 9–18 | 23–34 | 53–67 | 6 |
Armor
Titan Armor
| Type | Defense | Discipline | Intellect | Strength | |
|---|---|---|---|---|---|
| Mark of the Pit (Year 3) | Titan Marks | 365 - 400 | 21 - 35 | 21 - 35 | 21 - 35 |
| Willbreaker's Fists (Year 3) | Gauntlets | 365–400 | 34–58 | 34–58 | 34–58 |
| Willbreaker's Greaves (Year 3) | Leg Armor | 365–400 | 47–79 | 47–79 | 47–79 |
| Willbreaker's Resolve (Year 3) | Chest Armor | 365–400 | 51–86 | 51–86 | 51–86 |
| Willbreaker's Watch (Year 3) | Helmets | 365–400 | 38–65 | 38–65 | 38–65 |
Hunter Armor
| Type | Defense | Discipline | Intellect | Strength | |
|---|---|---|---|---|---|
| Dogged Gage (Year 3) | Gauntlets | 365–400 | 34–58 | 34–58 | 34–58 |
| Relentless Harness (Year 3) | Chest Armor | 365–400 | 51–86 | 51–86 | 51–86 |
| Shroud of Flies (Year 3) | Hunter Cloaks | 365 - 400 | 21 - 35 | 21 - 35 | 21 - 35 |
| Tireless Striders (Year 3) | Leg Armor | 365–400 | 47–79 | 47–79 | 47–79 |
| Unyielding Casque (Year 3) | Helmets | 365–400 | 38–65 | 38–65 | 38–65 |
Warlock Armor
| Type | Defense | Discipline | Intellect | Strength | |
|---|---|---|---|---|---|
| Bone Circlet (Year 3) | Warlock Bonds | 365 - 400 | 21 - 35 | 21 - 35 | 21 - 35 |
| Deathsinger's Gaze (Year 3) | Helmets | 365–400 | 38–65 | 38–65 | 38–65 |
| Deathsinger's Grip (Year 3) | Gauntlets | 365–400 | 34–58 | 34–58 | 34–58 |
| Deathsinger's Herald (Year 3) | Leg Armor | 365–400 | 47–79 | 47–79 | 47–79 |
| Deathsinger's Mantle (Year 3) | Chest Armor | 365–400 | 51–86 | 51–86 | 51–86 |
Other Items
- Oversoul's Pang - Titan Artifact
- Oversoul's Scream - Hunter Artifact
- Oversoul's Gasp - Warlock Artifact
Strategy Guide
The Abyss
- Turn your Brightness up (This can help with holes which lead to the Deep South)
- Bring 'Crowd Controling' weapons (Things with Firefly / Lots of bullets)
- Use your Super, don't be shy when there's like 20 Thrall chasing you.
- Tethers for slowing down chasing Thrall with Light of the Pack to share with your team - Ward of Dawn paired with Helm of Saint-14 to blind the packs chasing / protect the team - Stormtrance to tear through waves of Thrall - Crowd management is Key
- When the Lamps turn orange - RUN to the next one
- Stay as a group and try and move together
Bridges
- This encounter has changed with the update. Have fun, be patient and willing to learn
- Powerful & close range weapons can be key here
Ir Yut, the Deathsinger
- She is a witch (Of Cuba) that sits in the middle Crystal room but again, this now has a challenge mode linked to it so be patient and willing to learn as the encounter may have changed. Rockets, Sleeper Simulant, Decent Sniper or Exotic Sword served well previously
- Previously, she 'Sang' starting off a 30 second timer. If this ran out, you wiped. Stay on your toes and don't let that set off any panic
Crota
- At this point, there is NO health regeneration. Certain armor and weapons can help with this details below
- Gjallarhorn / Sleeper Simulant - Decent Sniper for Knights / Wizards
- Bladedancers are usually the 'GO TO' Swordbearer as they have abilities to go invisible. The old trick was to grab sword, crouch to go invis, team rockets Crota (Crota kneels), Sword him then DROP the sword and melee crota to go back invisible (Using Bladedancer Perk - Escape Artist), Rockets come back after his Shield goes and 2nd damage phase before running to safety - Don't be shocked if people ASK for Bladedancers to run sword
- As you are new I'd expect you won't be the Sword bearer (But please try it, it's awesome)
- Helmets / Weapons with healing perks can be a big advantage here. Helmet perk to look out for is 'Infusion' - Replenishes health each time you pick up an Orb or 'Better Already' - Shields Regen when picking up an Orb. Weapons that can do this - Red Death, Suros Regime
- Consider using Supers in the 'Crystal Room' before Crota. Creating Orbs here and matching with Regen perks with picking up Orbs can save lives
- Again, Challenge mode linked could change how this plays out
